
In this blog post, I will update on the configuration of the ER-X interfaces, the switch and the VLAN configuration. We will need to do the following configuration on the router as follows
- The management IP on the router’s eth0 to be 192.168.8.1/24
- Placement of eth1, eth2 and eth3 in Switch0
- VLAN and sub-interface configuration of Switch0
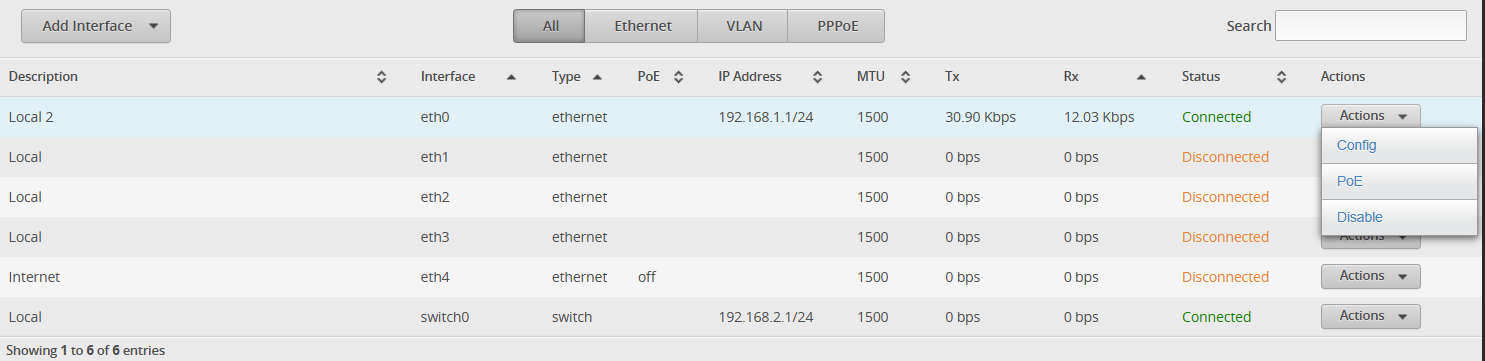
Step 1: Login to the management page and we will see the eth0 IP to be 192.168.1.1/24. We are going to change this by clicking on the “Actions” >> “Config” button.
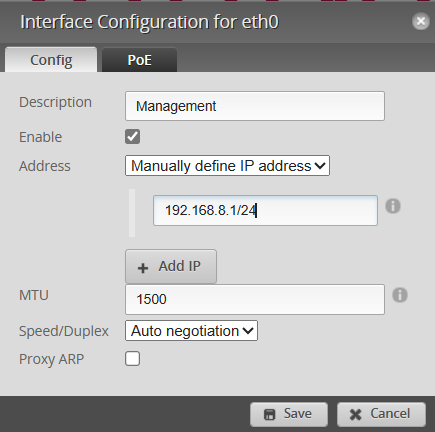
Step 2: Let’s change the description to “Management” and Address to be 192.168.8.1/24 and click on the “Save” button as shown below.
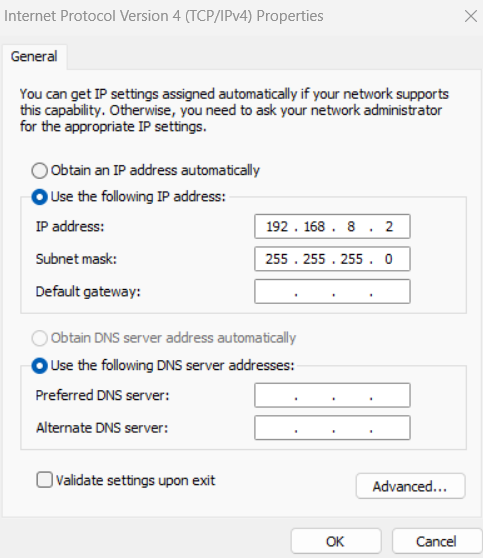
Step 3: You will lose connectivity immediately as your management laptop is still using the 192.168.1.0/24 range. Now we will need to change your management laptop IP address from 192.168.1.2/24 to 192.168.8.2/24.
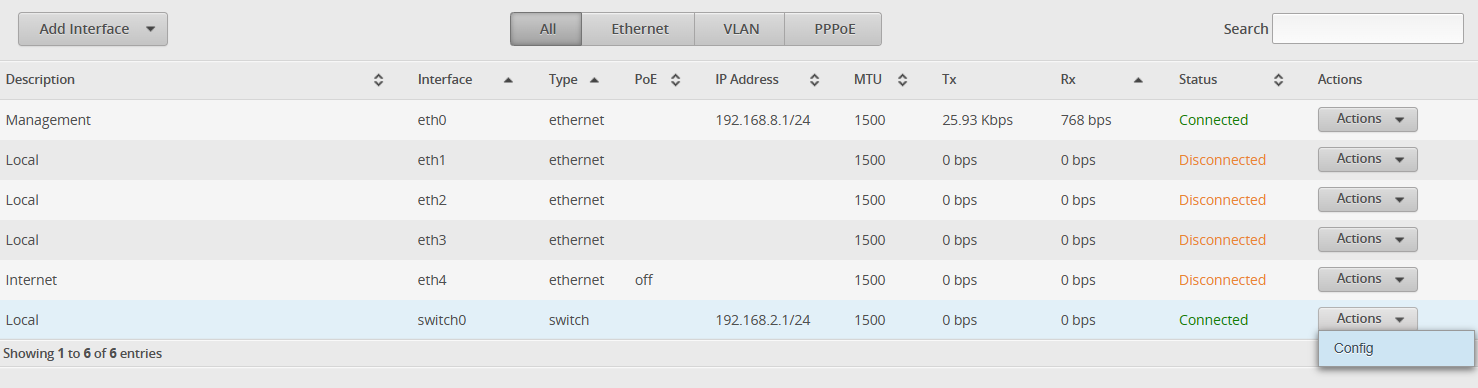
Step 4: Let’s login back to the router management console using the IP 192.168.8.1/24

Step 5: Place eth1, eth2 and eth3 to be part of Switch0. We can do this by selecting the interface Switch0, click on “Actions” >> “Config” button.
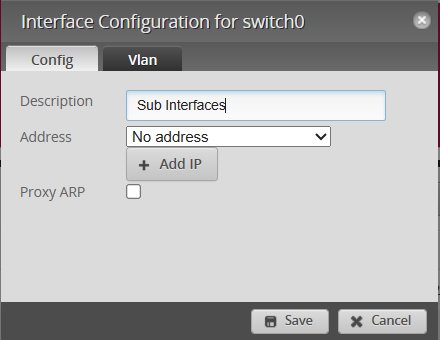
Step 6: Change the description to “Sub Interfaces” and “Address” option, select “No Address”
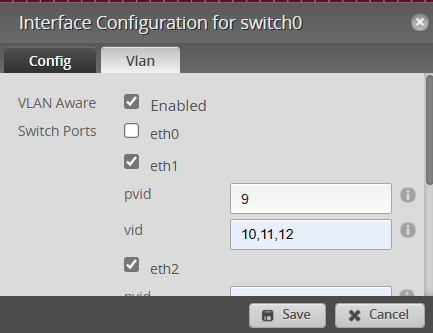
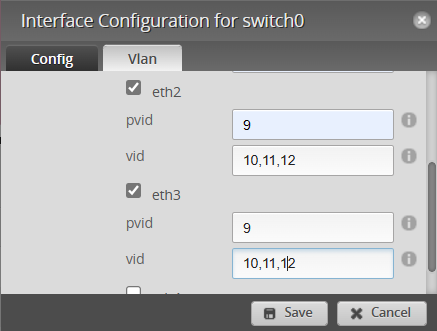
Step 7: Select the “VLAN” tab and ensure “VLAN Aware” option is “Enabled” and “eth1”, “eth2” and “eth3” switch ports are selected. For every selected switch port, we need to configure VLAN 9 as native and VLAN 10,11,12 to be trunk. Therefore we input the “pvid” value to be “9” and “vid” value to be “10,11,12” and select “Save”
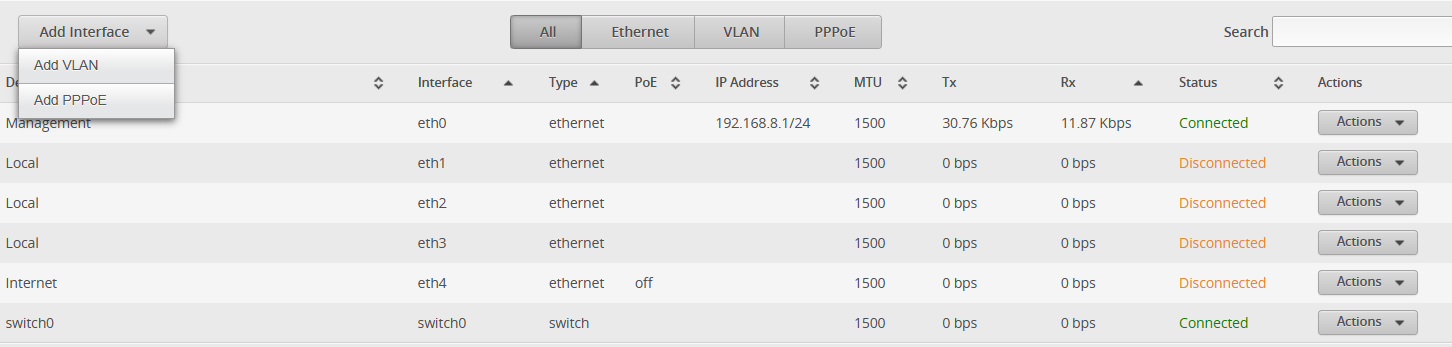
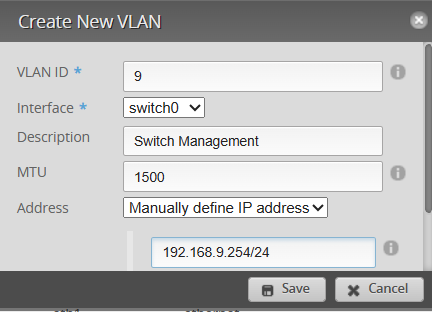
Step 8: We will need to add the gateways for the respective VLANs. Select the “Add Interface” option from the Dashboard and choose “Add VLAN”.
Step 9: Let’s start by adding VLAN 9 with IP address 192.168.9.254/24. Choose the interface to be “Switch0” and we put “Switch Management” in the description field. Then we select “Save”.
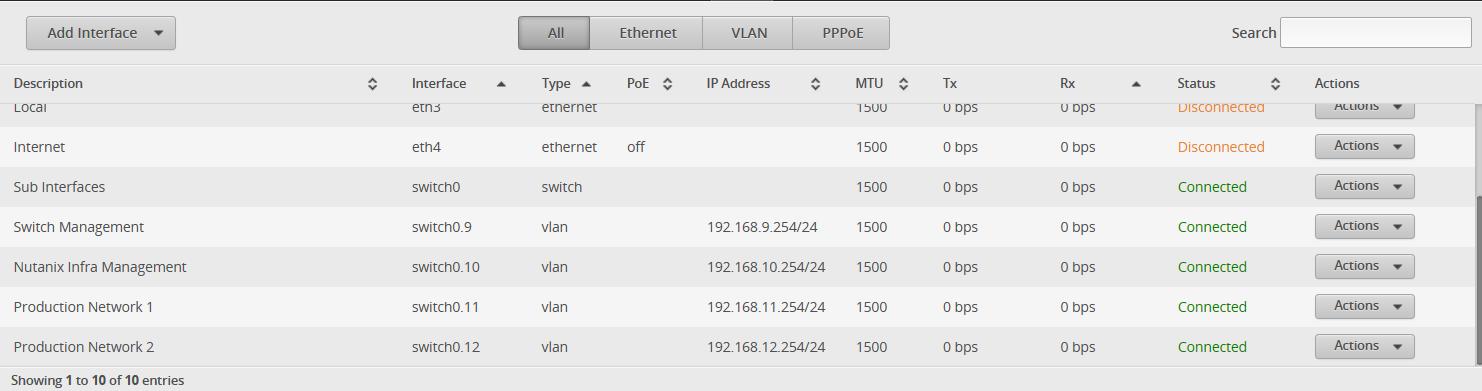
Step 10: Repeat Step 9 to add the following VLANs.
- VLAN 10 – Gateway= 192.168.10.254/24 – Description= Nutanix Infra Management
- VLAN 11 – Gateway= 192.168.11.254/24 – Description= Production Network 1
- VLAN 12 – Gateway=192.168.12.254/24 – Description= Production Network 2
Your configuration should look as per below if its configured correctly
Step 11: Connect up the internet to eth4 and you should see an DHCP IP address in the 172.16.1.0/24 range.

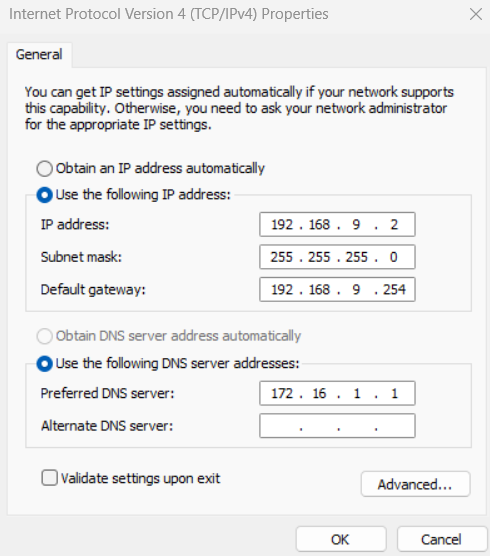
Step 12: Let’s perform basic connectivity test by connecting management laptop to eth1,eth2 or eth3 and change your management laptop IP to 192.168.9.2/24 with 192.168.9.254 as the gateway and 172.16.1.1 as your DNS.
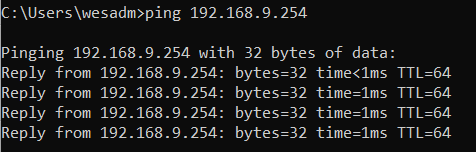
Step 13: Perform the following PING test to 192.168.9.254 and you should get a reply. You should also get a reply when pinging the following gateways
- 192.168.10.254
- 192.168.11.254
- 192.168.12.254
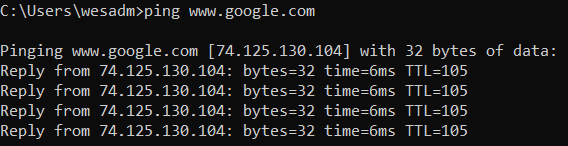
Step 14: Perform a PING test to http://www.google.com and you should get a reply as well
We are now done with the ER-X configuration. In the next post, I will share on the switch configuration on TP-Link SG108E.

You must be logged in to post a comment.