
Before we can deploy Prism Central, we will need to create a subnet where Prism Central will connect to.
You will need the following information for this lab
| Key | Value |
|---|---|
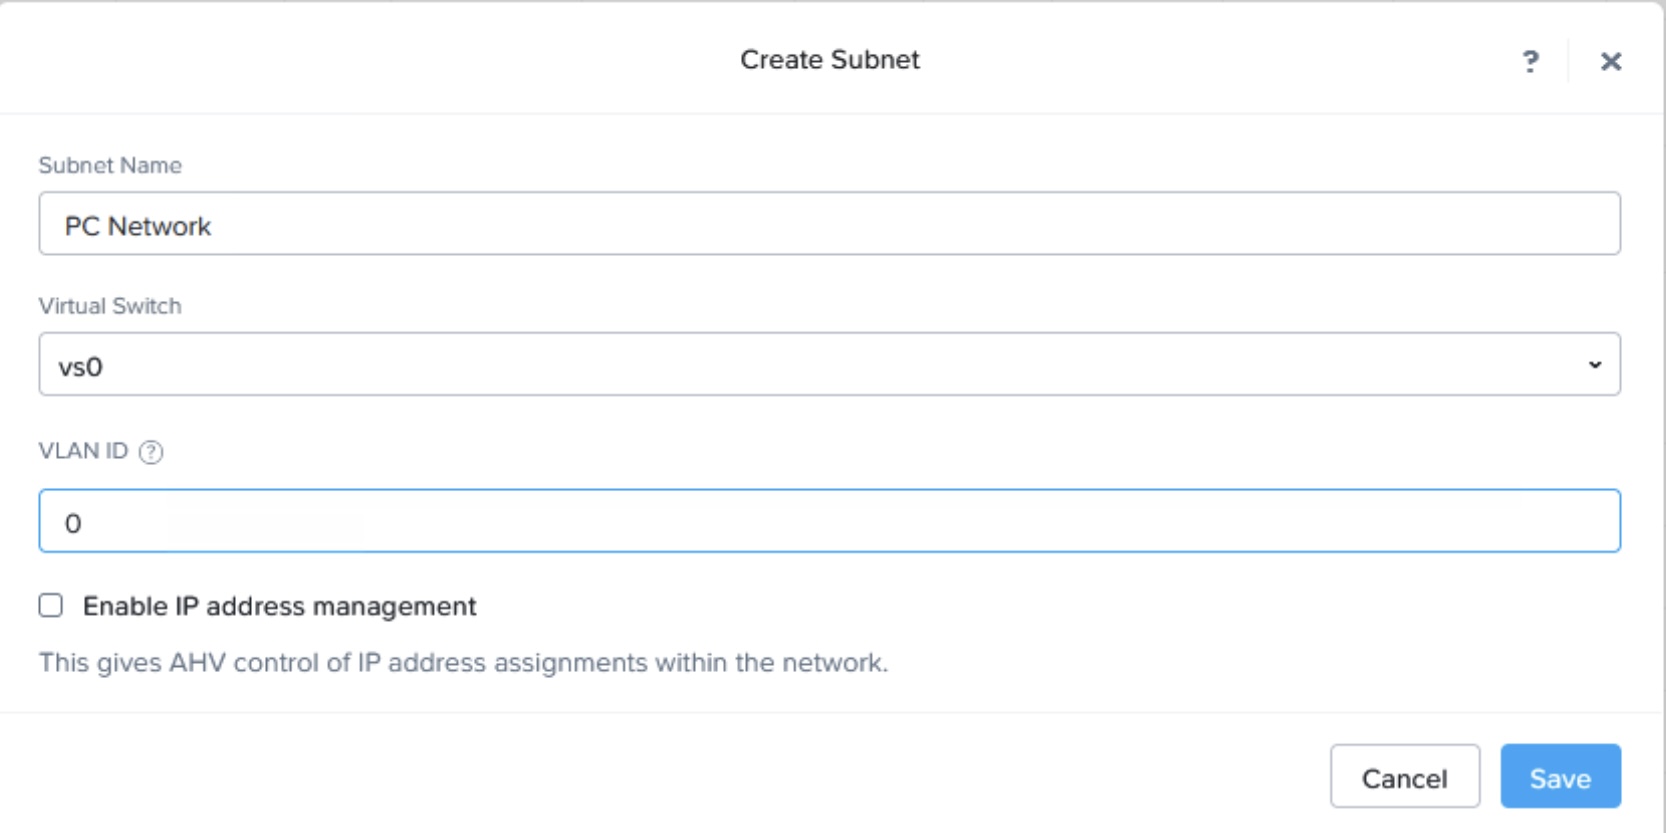
| Subnet Name | PC Network |
| Virtual Switch Name | vs0 |
| Subnet VLAN | 0 |
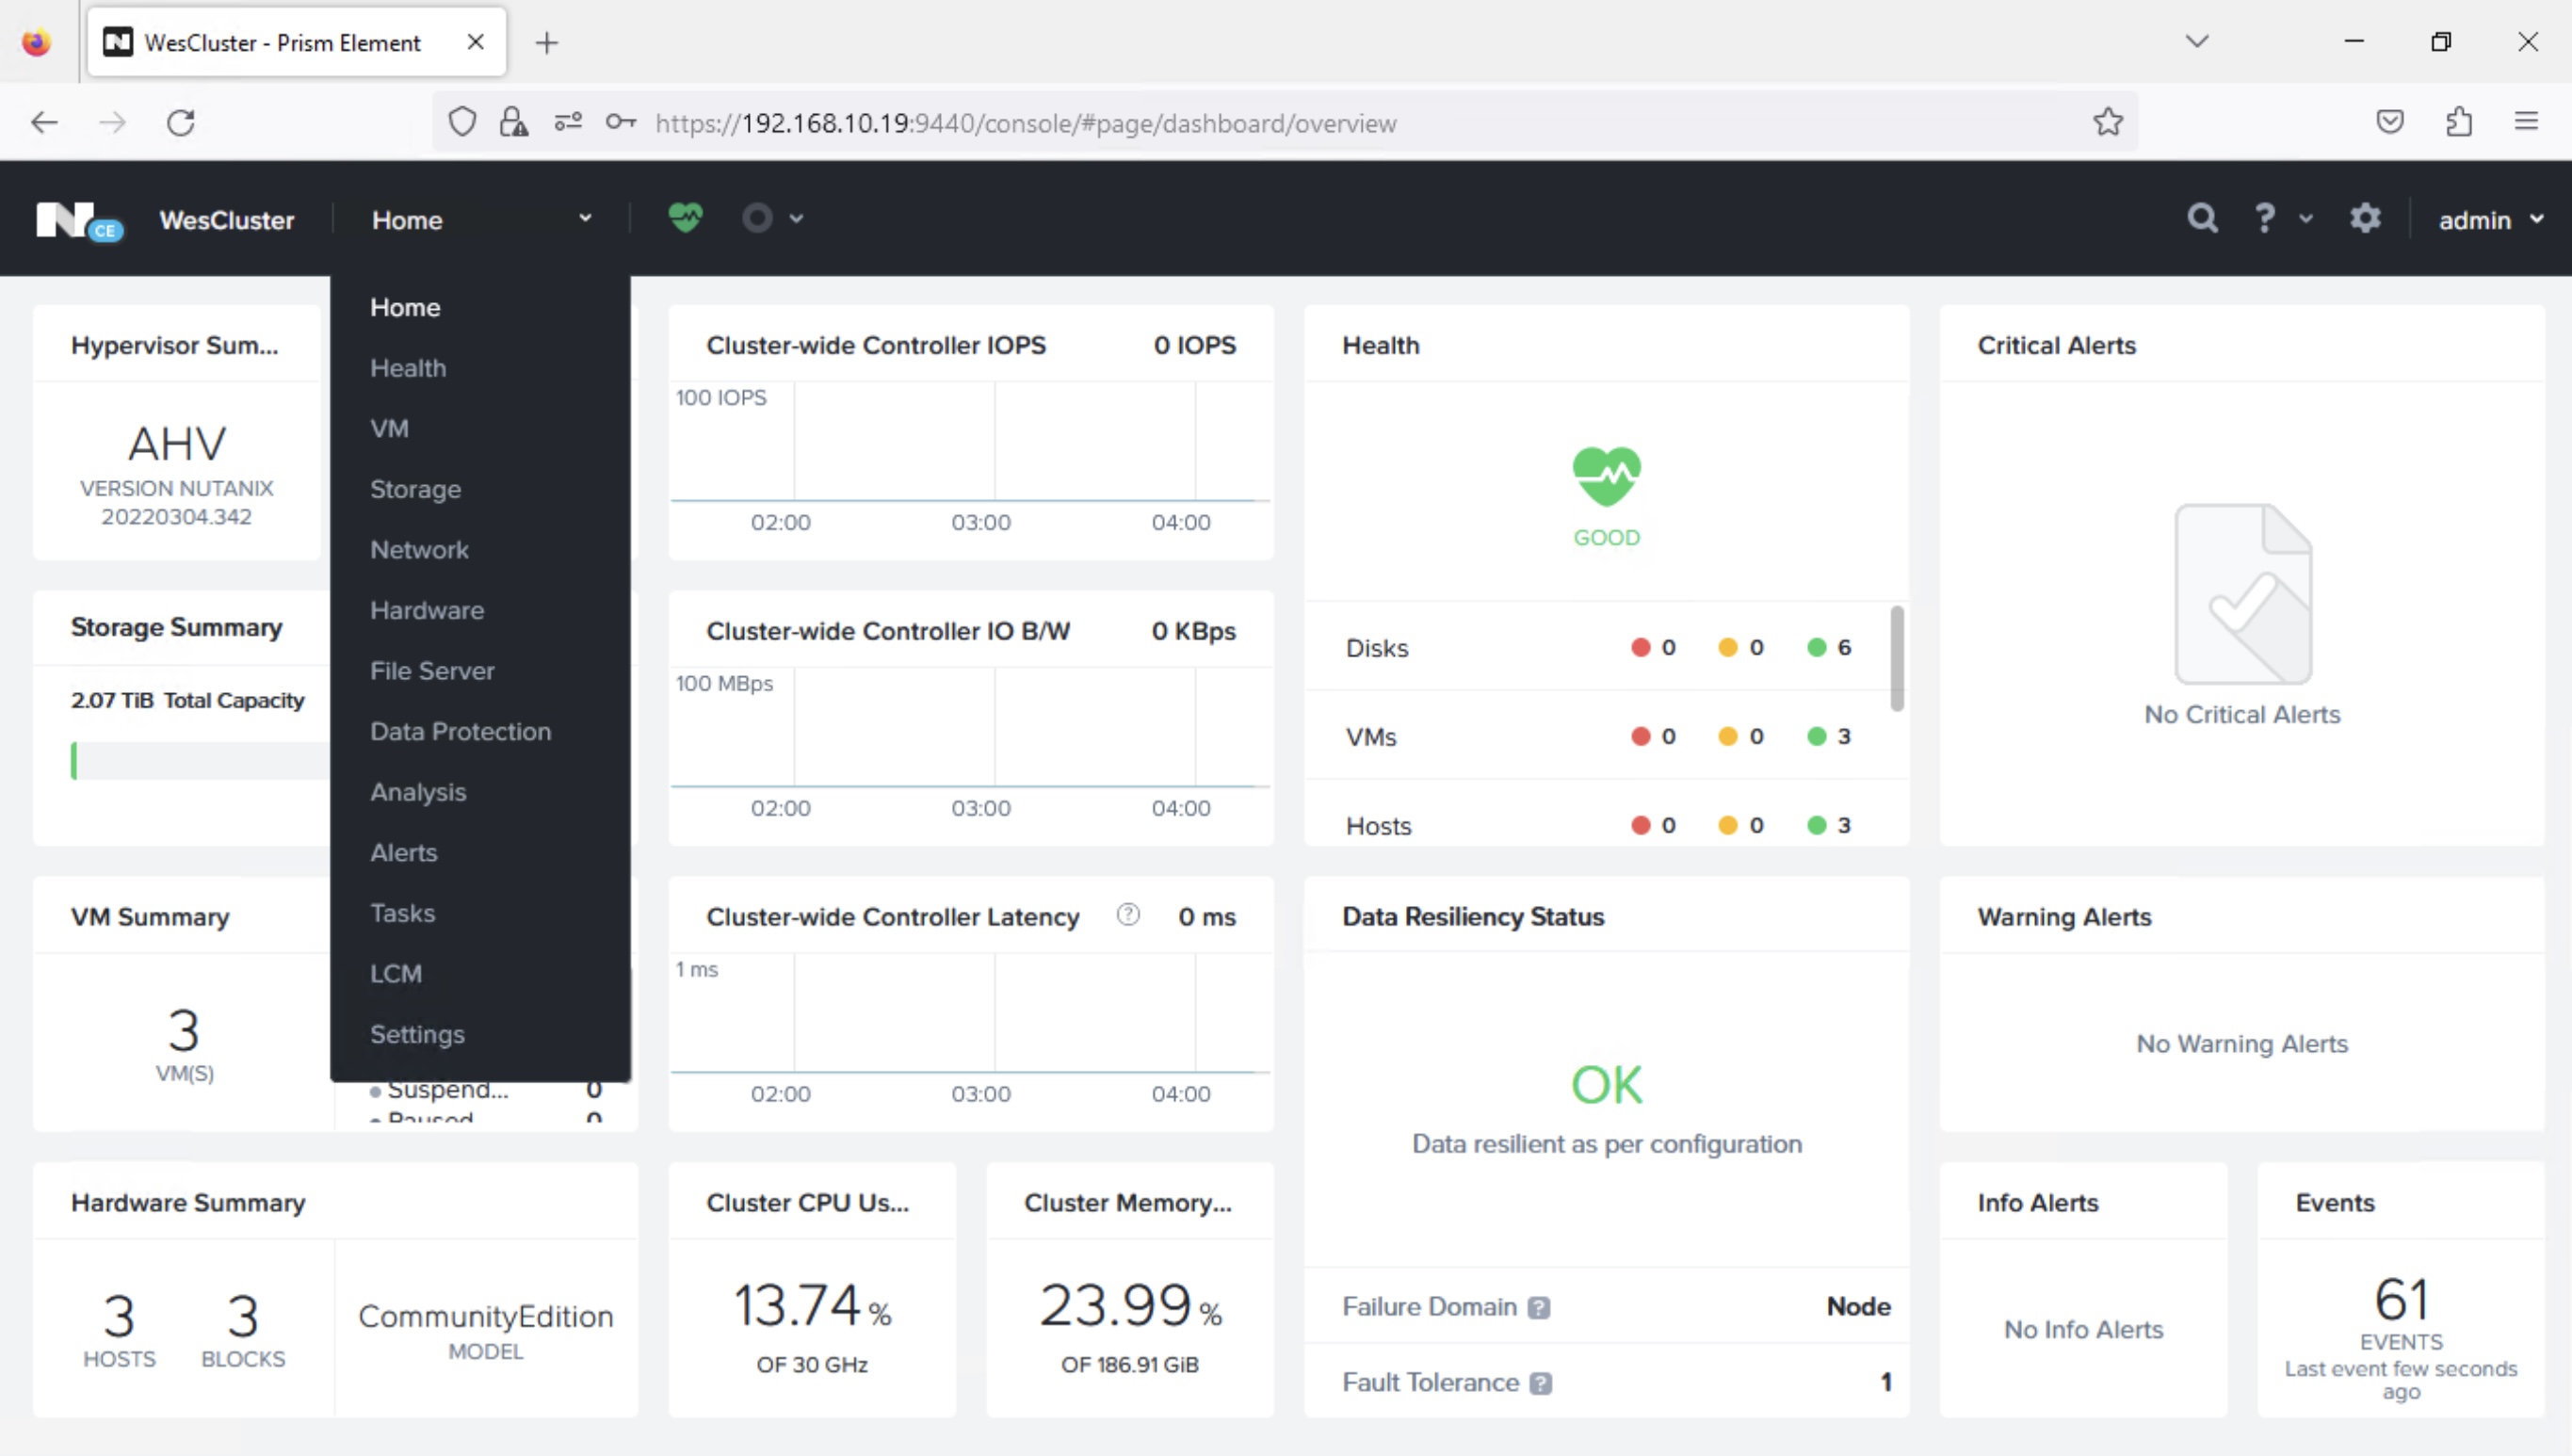
Step 1: Go to Prism Element home page and choose “VM” from the drop down list
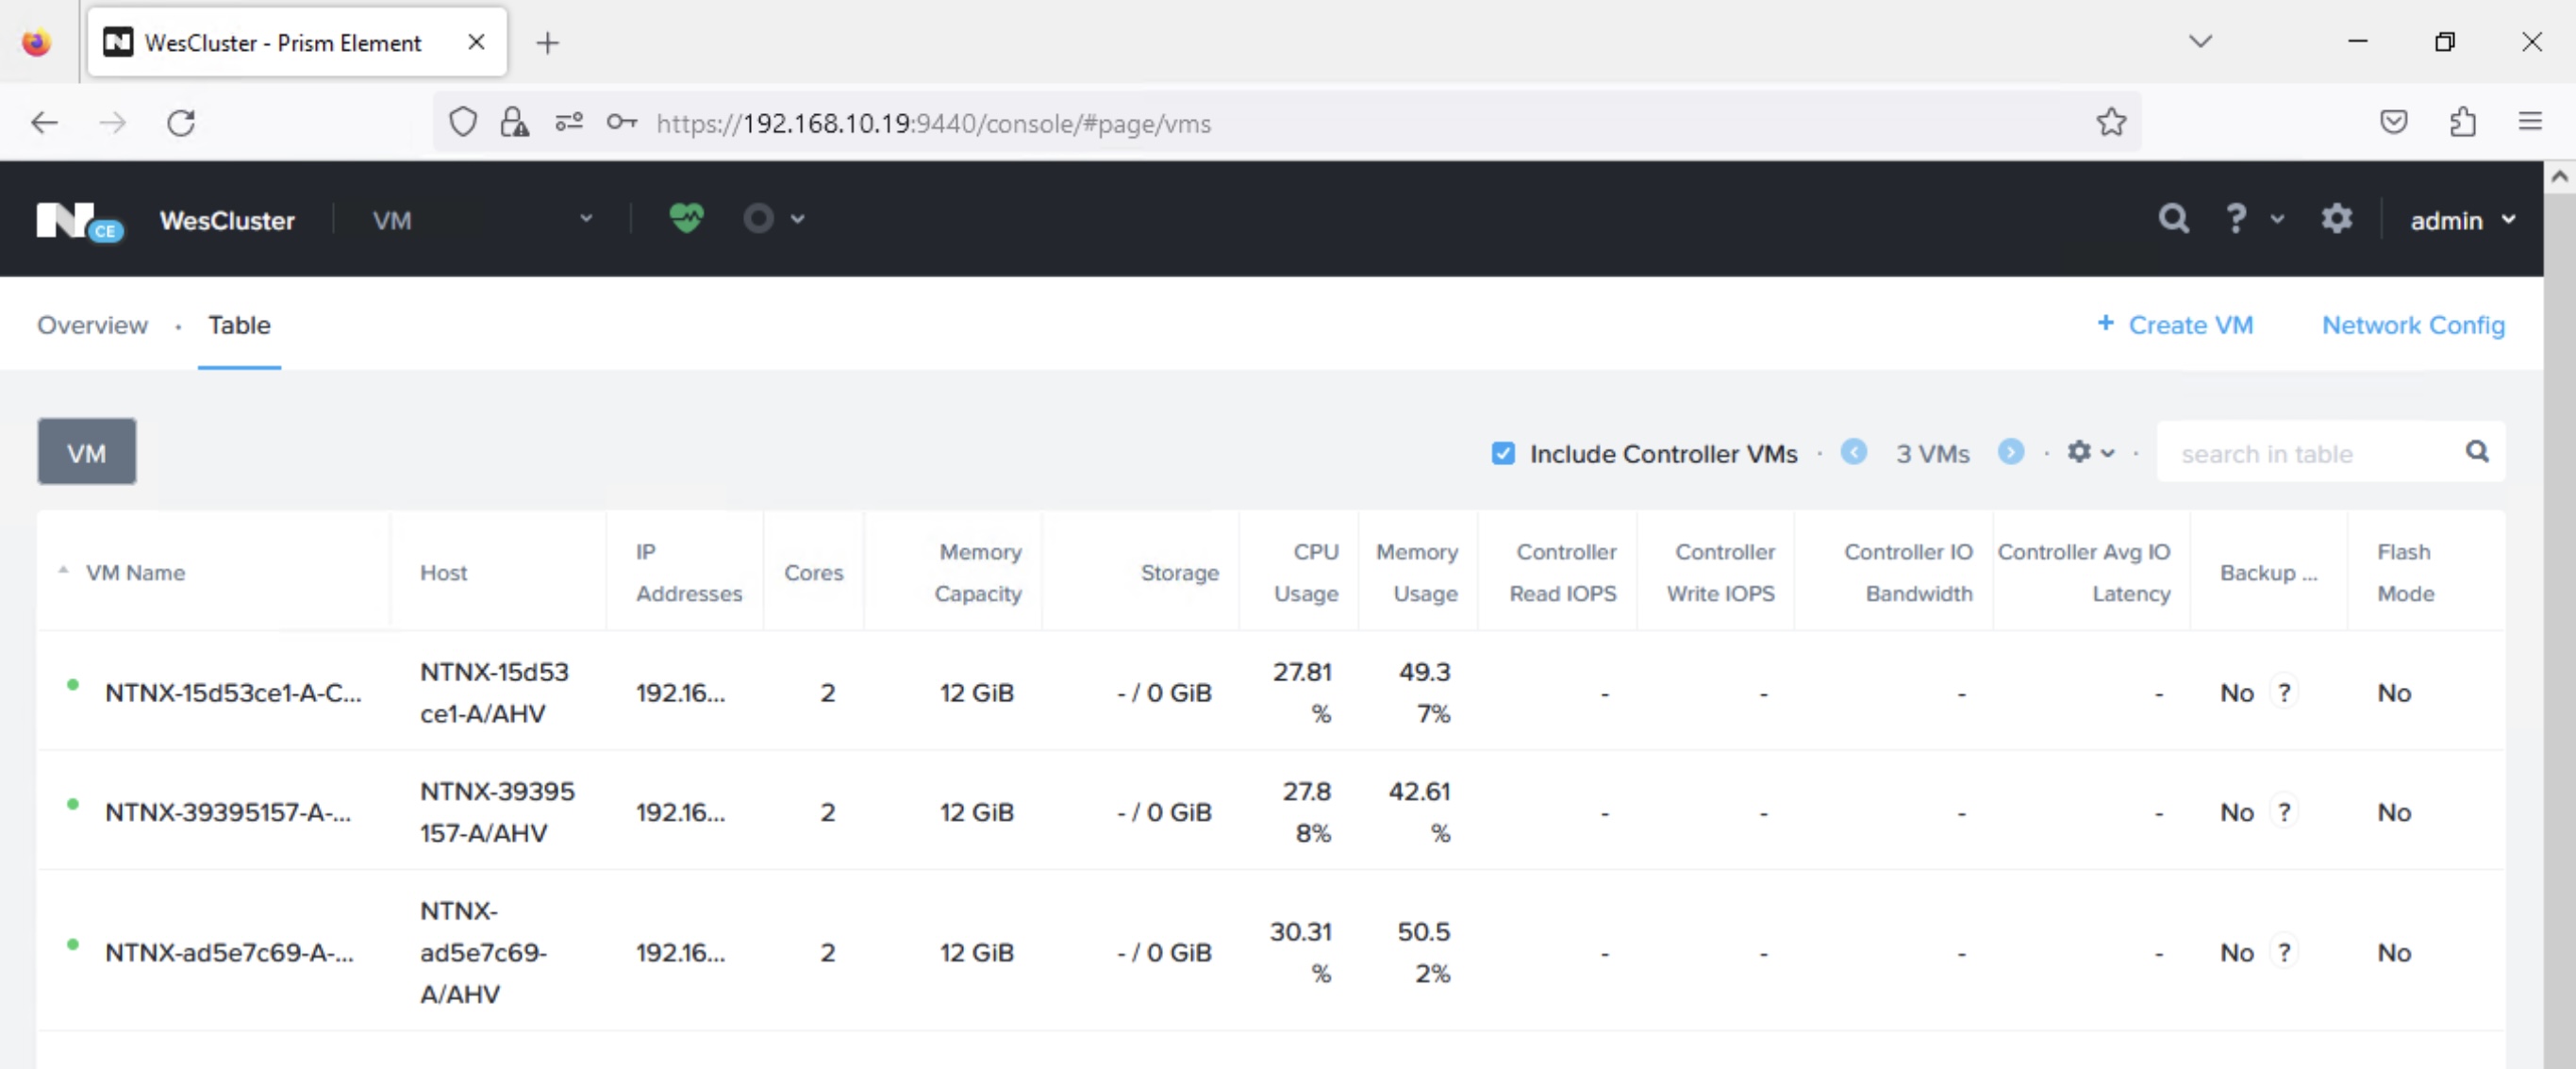
Step 2: At the VM page, choose the “Network Config” button.
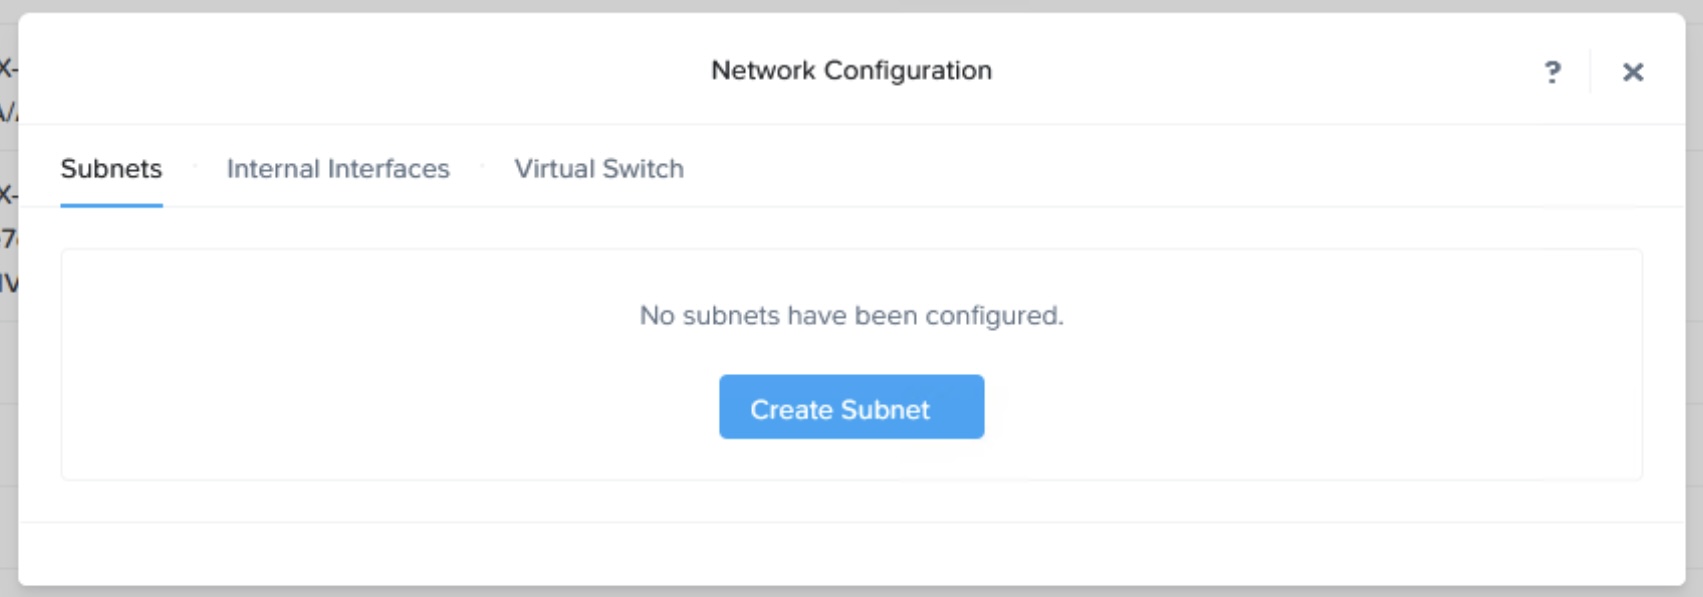
Step 3: Click on the “Create Subnet” option on the pop up.
Step 4: Enter “Subnet Name” and “VLAN ID” as shown and click “Save”
Step 5: You should see the below if the subnet is successfully created.
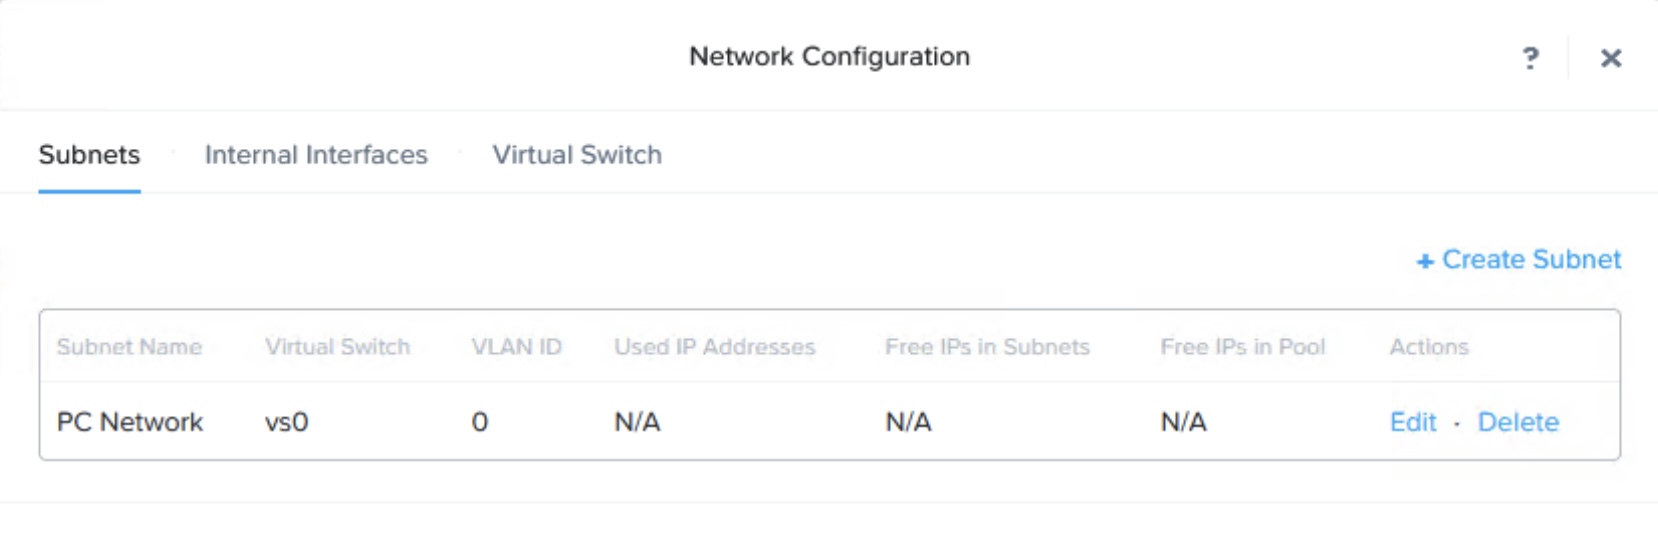
With “PC Network” created, we are ready to deploy the Prism Central. In the next blog post, I will share the steps for Prism Central deployment.

You must be logged in to post a comment.