
In this blog series, I will share on the preparation steps we need to perform on Asus PN64-E1 before we can install Nutanix CE.
We will need to tweak some of the BIOS settings in Asus PN64-E1 before we can install Nutanix CE 2.0. We will also disable the unnecessary services from the Asus PN64-E1 BIOS.
Step 1: Boot into the BIOS by pressing DEL when the Asus PN64-E1 boots at its BIOS splash screen
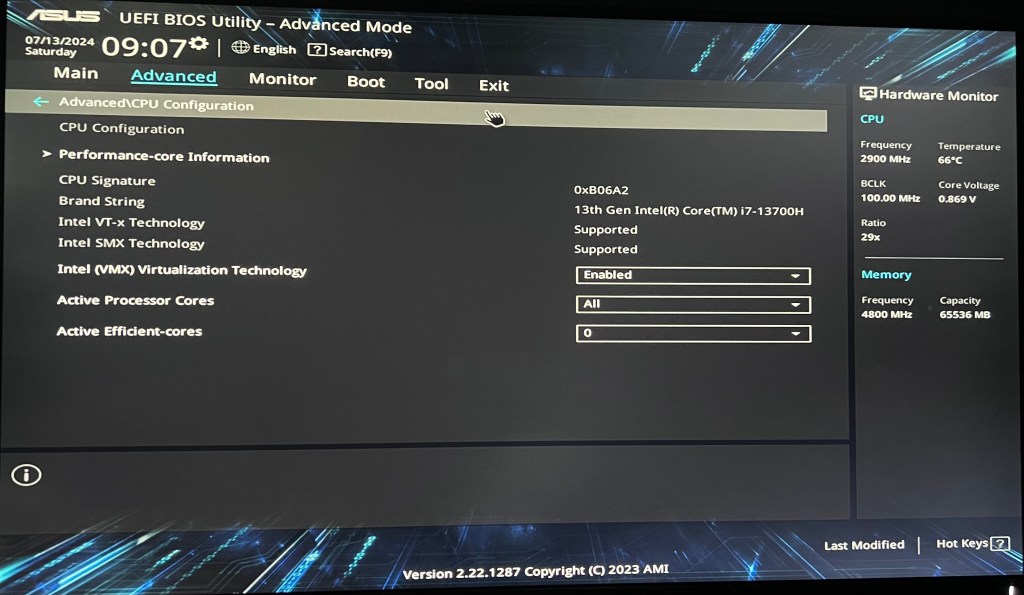
Step 2: Go to “Advanced\CPU Configuration” tab and ensure the following settings are configured
- Intel VMX Technology —> “Enabled”
- Active Processor Cores —> “All”
- Active Efficient Cores —> “0”
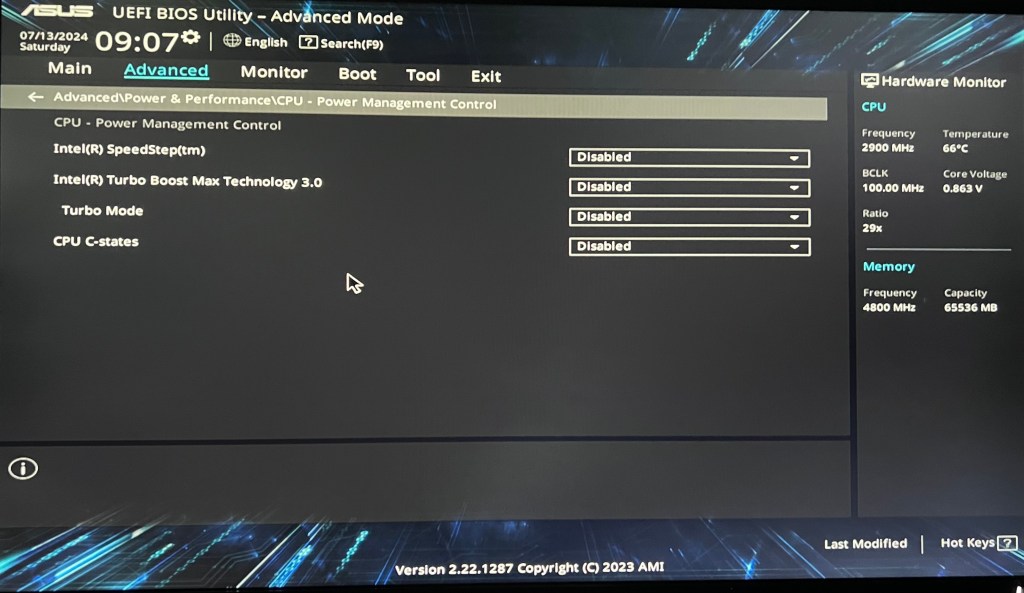
Step 3: Go to “Advanced\Power & Performance\CPU – Power Management Control” tab and ensure the following settings are configured
- Intel SpeedStep —> Disabled
- Intel Turbo Boost Max Technology 3.0 —> Disabled
- Turbo Mode —> Disabled
- CPU C-states —> Disabled
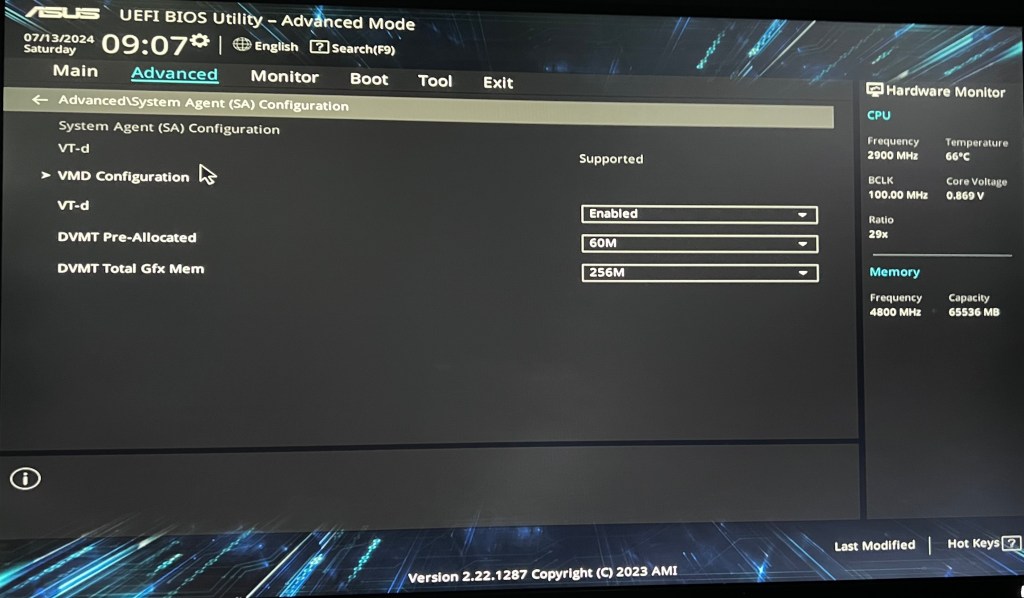
Step 4: Go to “Advanced\System Agent (SA) Configuration” tab and ensure the following settings are configured
- VT-d —> Enabled
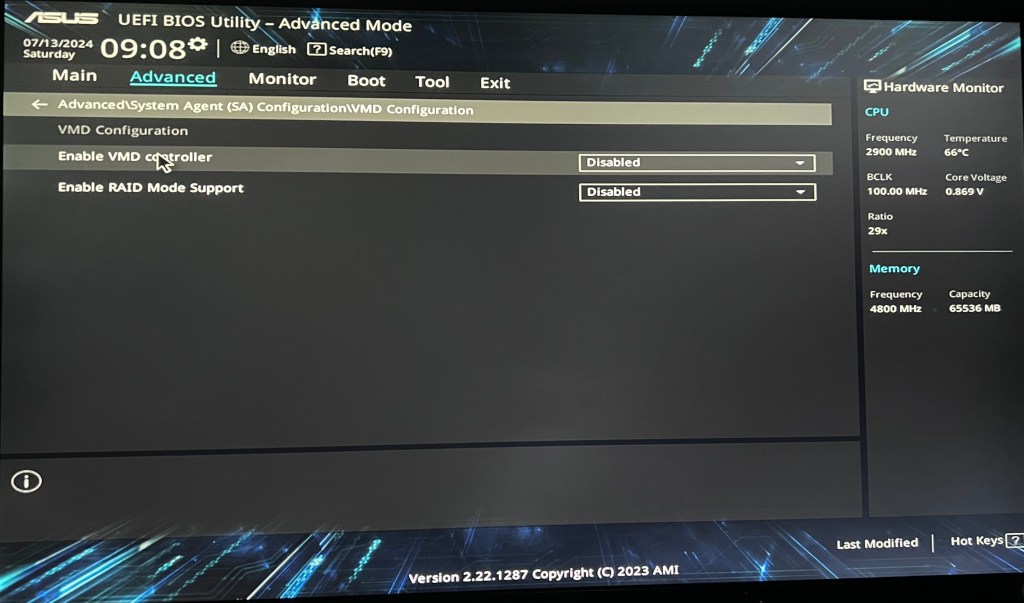
Step 5: Go to “Advanced\System Agent (SA) Configuration\VMD Configuration” tab and ensure the following settings are configured
- Enable VMD controller —> Disabled
- Enable RAID Mode Support —> Disabled
Step 6: Go to “Advanced\PCH Storage Configuration” tab and ensure the following settings are configured
- Aggressive LPM Support —> Disabled

Step 7: Go to “Advanced\PCH-FW Configuration” tab and ensure the following settings are configured.
- TPM Device Selection —> Enable Discrete TPM

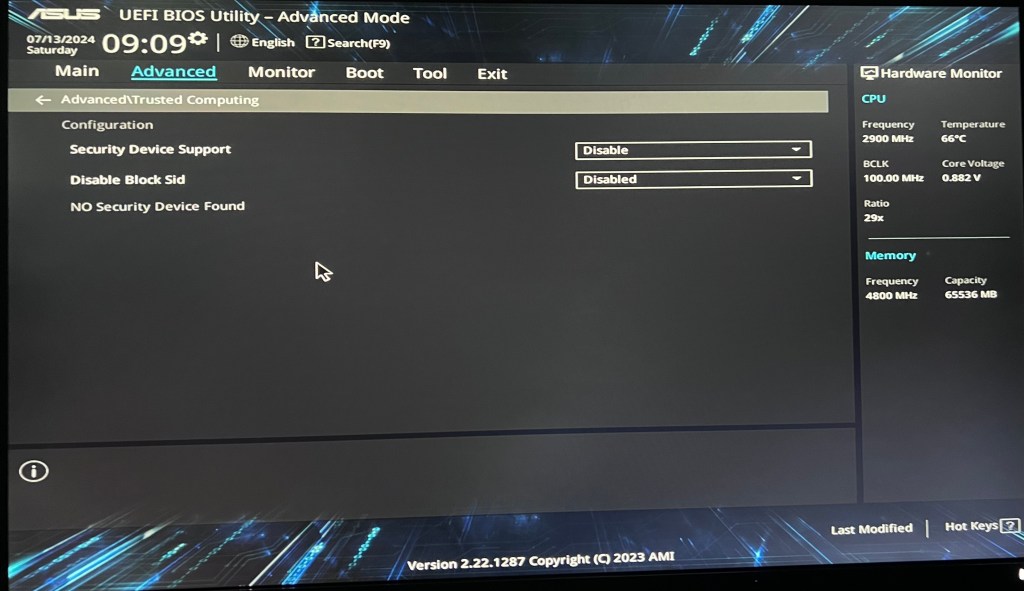
Step 8: Go to “Advanced\Trusted Computing” tab and ensure the following settings are configured
- Security Device Support —> Disable
- Disable Block Sid —> Disabled
Step 9: Go to “Advanced\Network Stack Configuration” tab and ensure the following settings are configured
- Network Stack —> Disabled

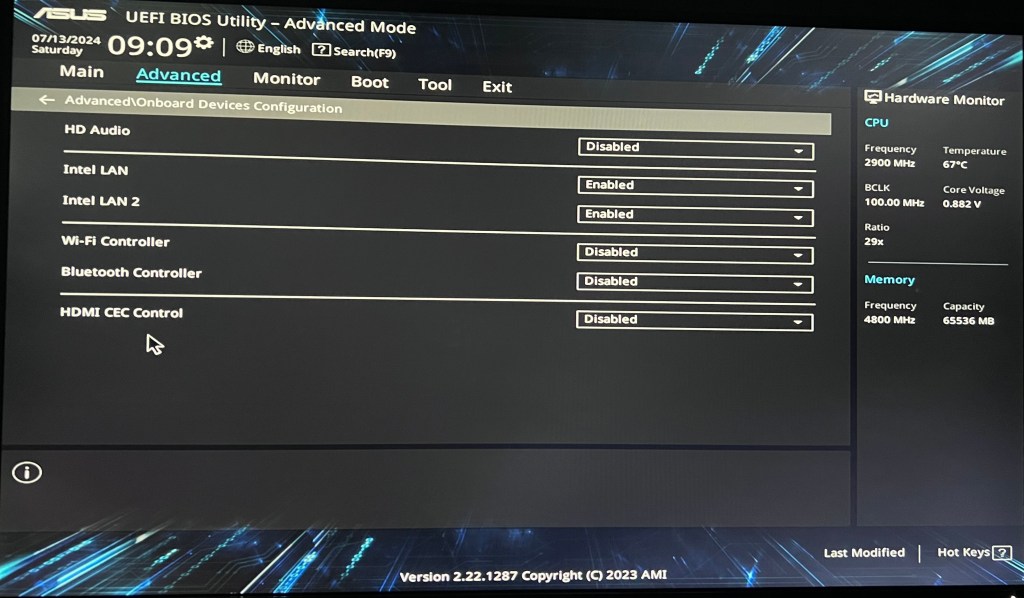
Step 10: Go to “Advanced\Onboard Devices Configuration” tab and ensure the following settings are configured
- HD Audio —> Disabled
- Intel LAN —> Enabled
- Intel LAN 2 —> Enabled
- Wi-Fi Controller —> Disabled
- Bluetooth Controller —> Disabled
- HDMI CEC Control —> Disabled
Step 11: Go to “Advanced\APM Configuration” tab and ensure the following settings are configured
- Restore AC Power Loss —> Power Off
- ErP Ready —> Disabled
- Power On By PCI-E —> Disabled
- Power On By USB —> Disabled
- Power On by RTC —> Disabled

Step 12: Go to “Boot\Secure Boot” tab and ensure that secure boot is not enabled and the following settings are configured
- Secure Boot state —> Setup
- OS Type —> Other OS
- Secure Boot Mode —> Custom

Step 13: Go to “Boot\Boot Configuration” tab and ensure the following settings are configured
- Fast Boot —> Disabled
- Boot Logo Display —> Auto
- POST Delay Time —> 3 sec

With all these configurations, we are ready to install the Nutanix CE 2.0. In the next blogpost, I will share on the steps to install Nutanix CE into the Asus PN64-E1.

You must be logged in to post a comment.