
In this blog series, I will share on the preparation steps we need to perform on Intel NUC before we can install Nutanix CE.
We will need to tweak some of the BIOS settings in Intel NUC before we can install Nutanix CE 2.0. We will also disable the unnecessary services from the Intel NUC BIOS.
Step 1: Boot into the BIOS by pressing F2 when the Intel NUC boots at its BIOS splash screen
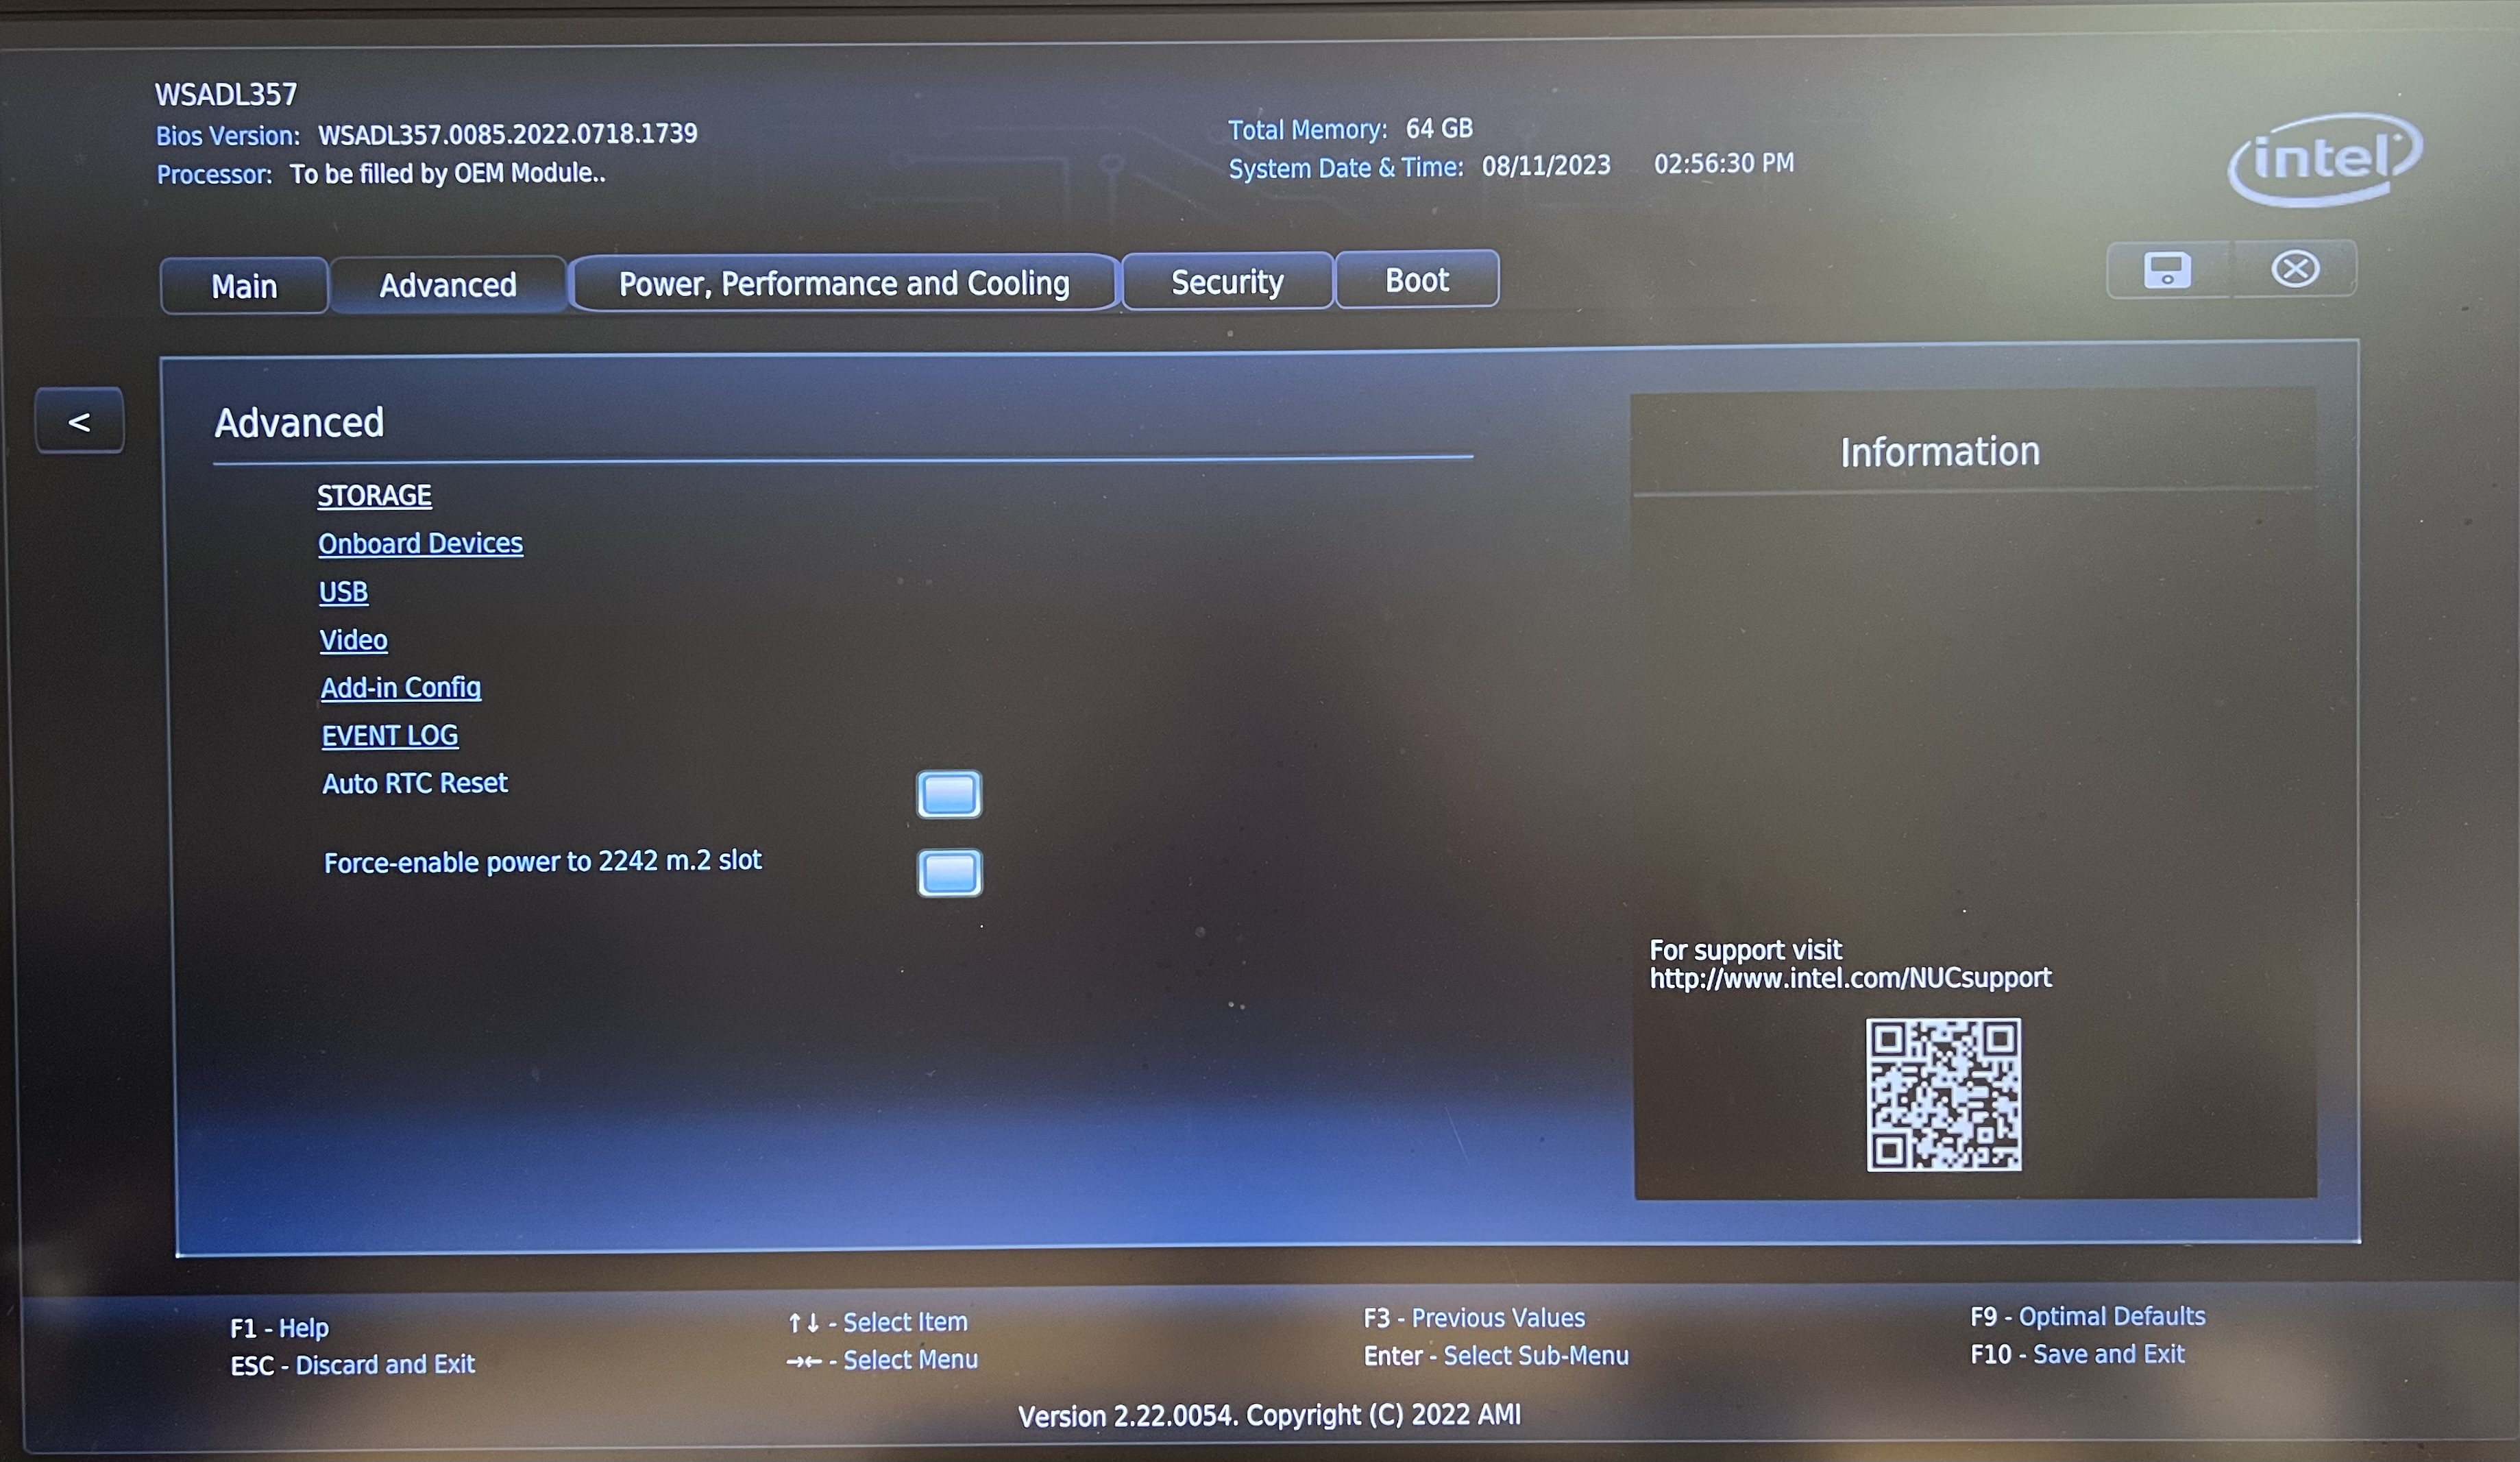
Step 2: Go to “Advanced” tab and ensure the following settings are unchecked
- “Auto RTC Reset”
- “Force-enable power to 2242 m.2 slot”
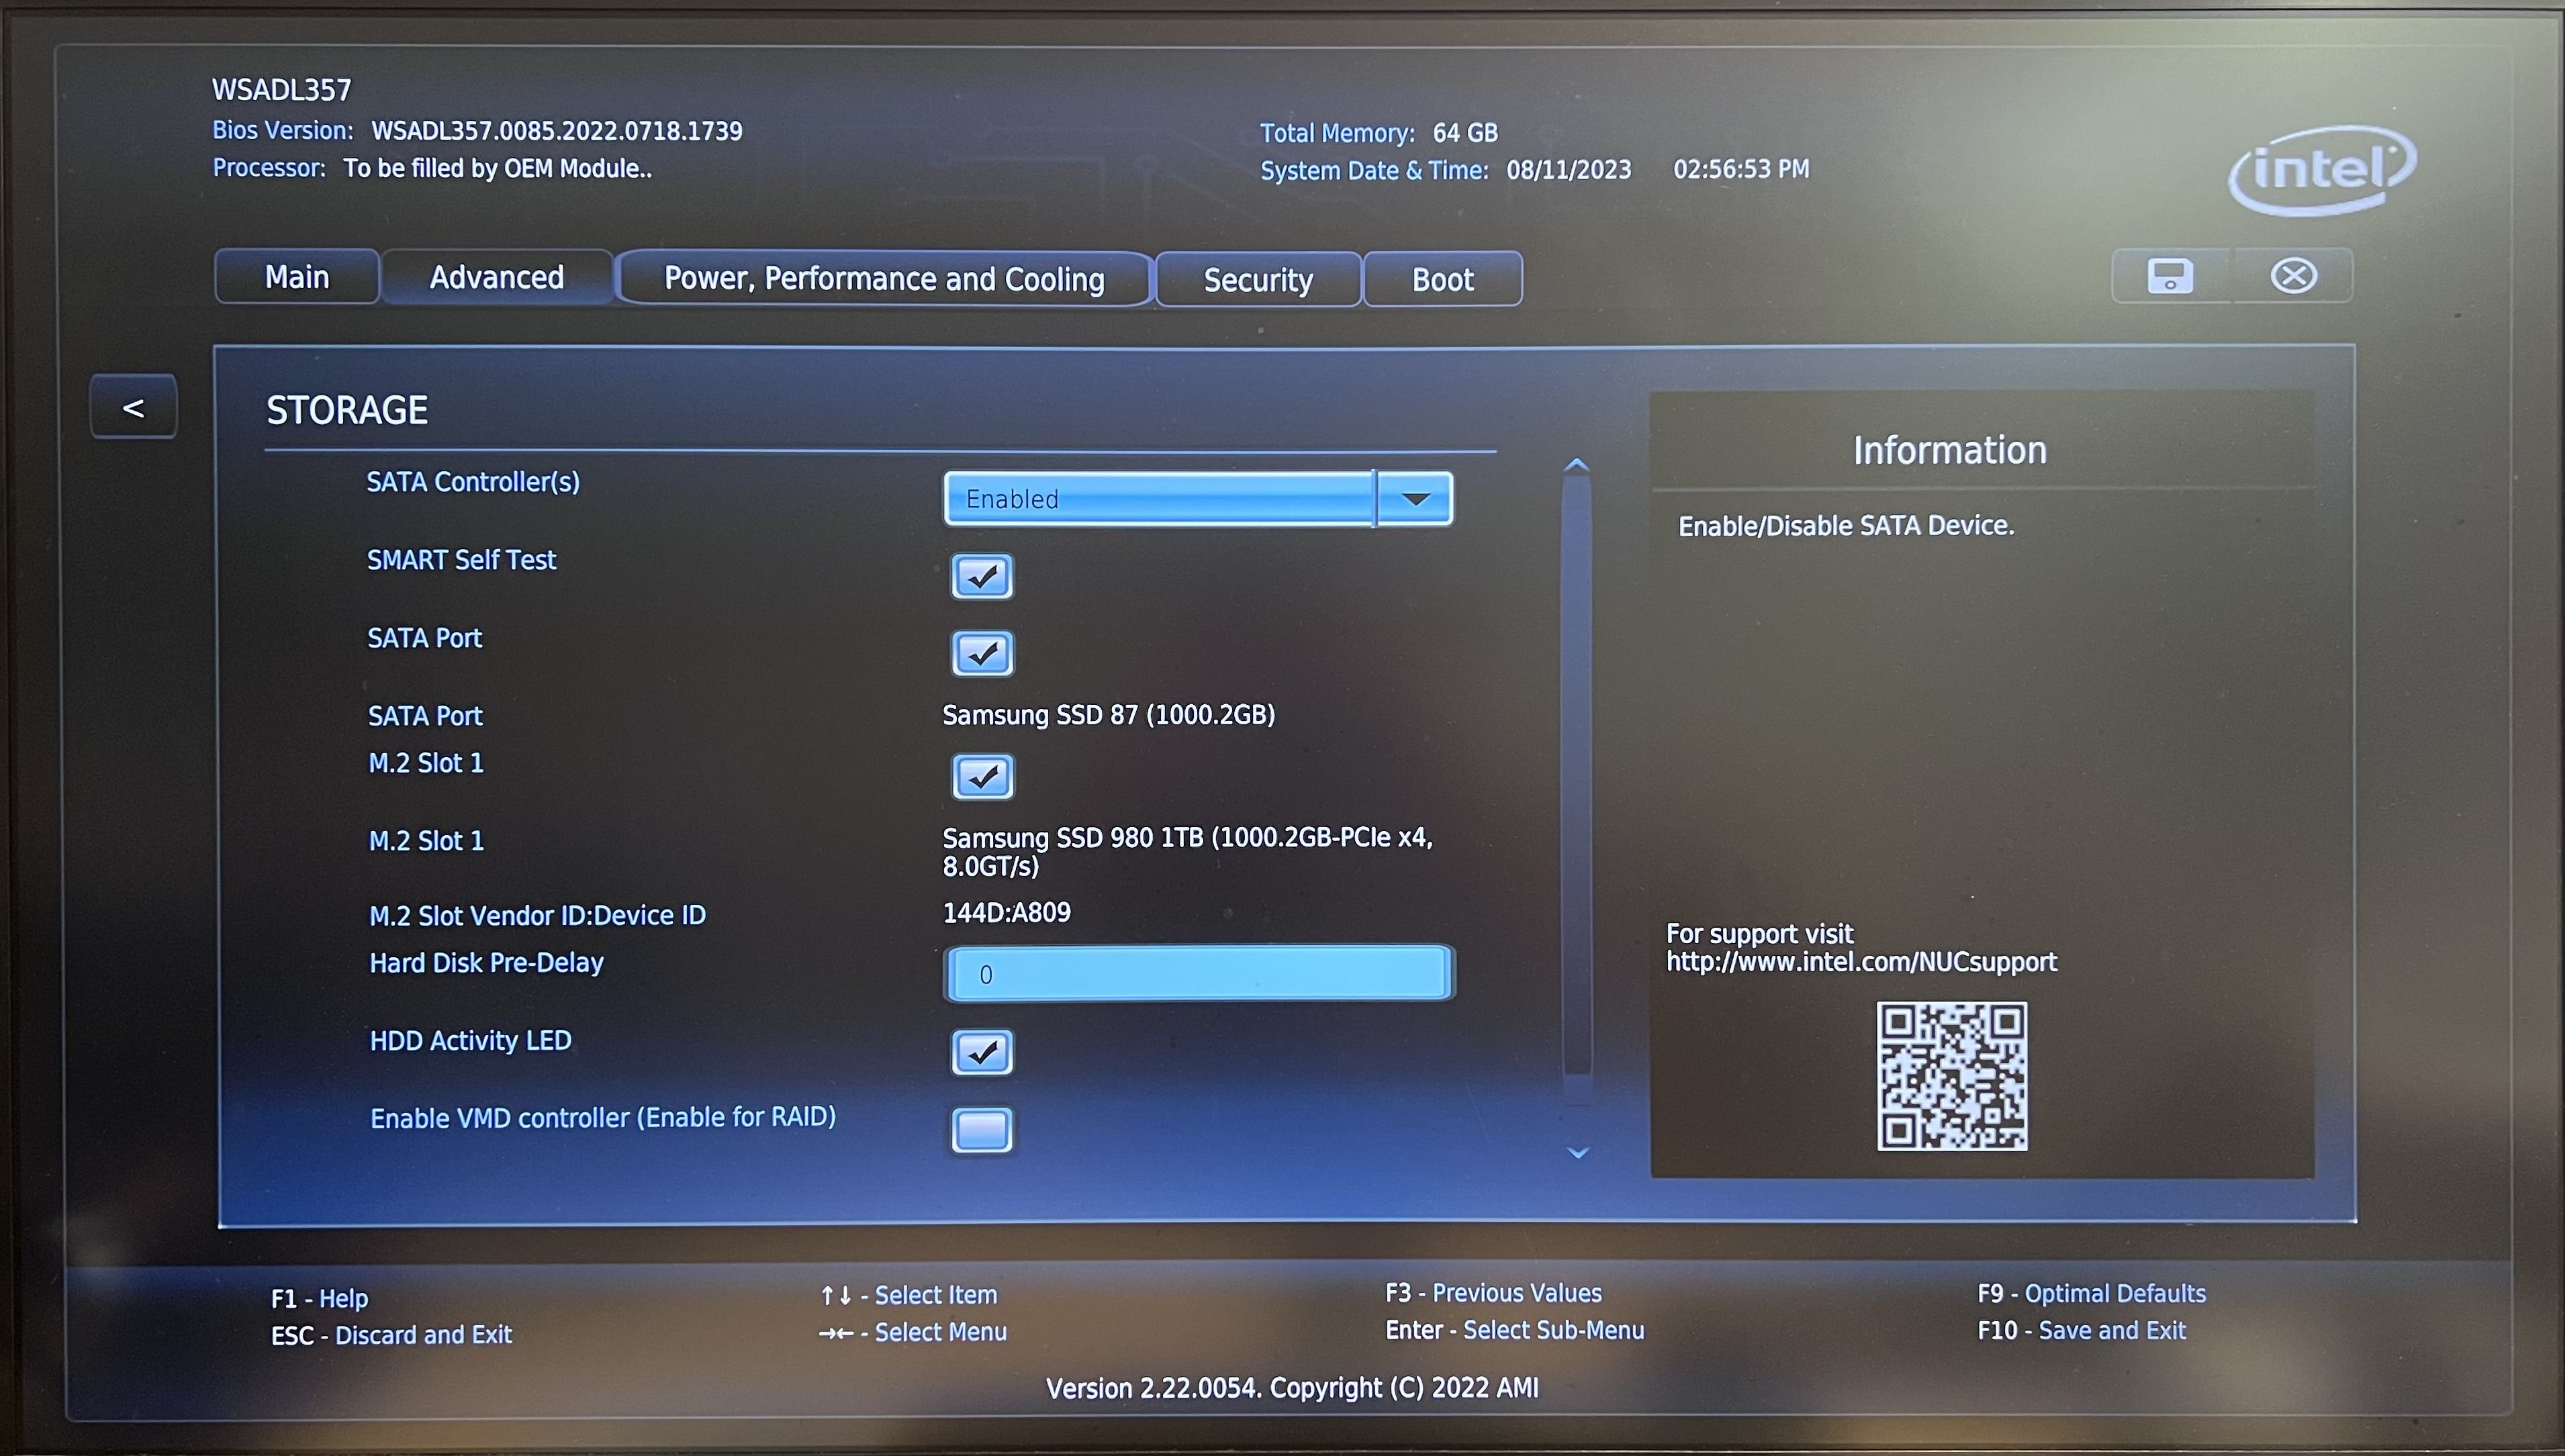
Step 3: In the same tab, choose “STORAGE” option and ensure the following setting is unchecked
- Enable VMD controller (Enable for RAID)
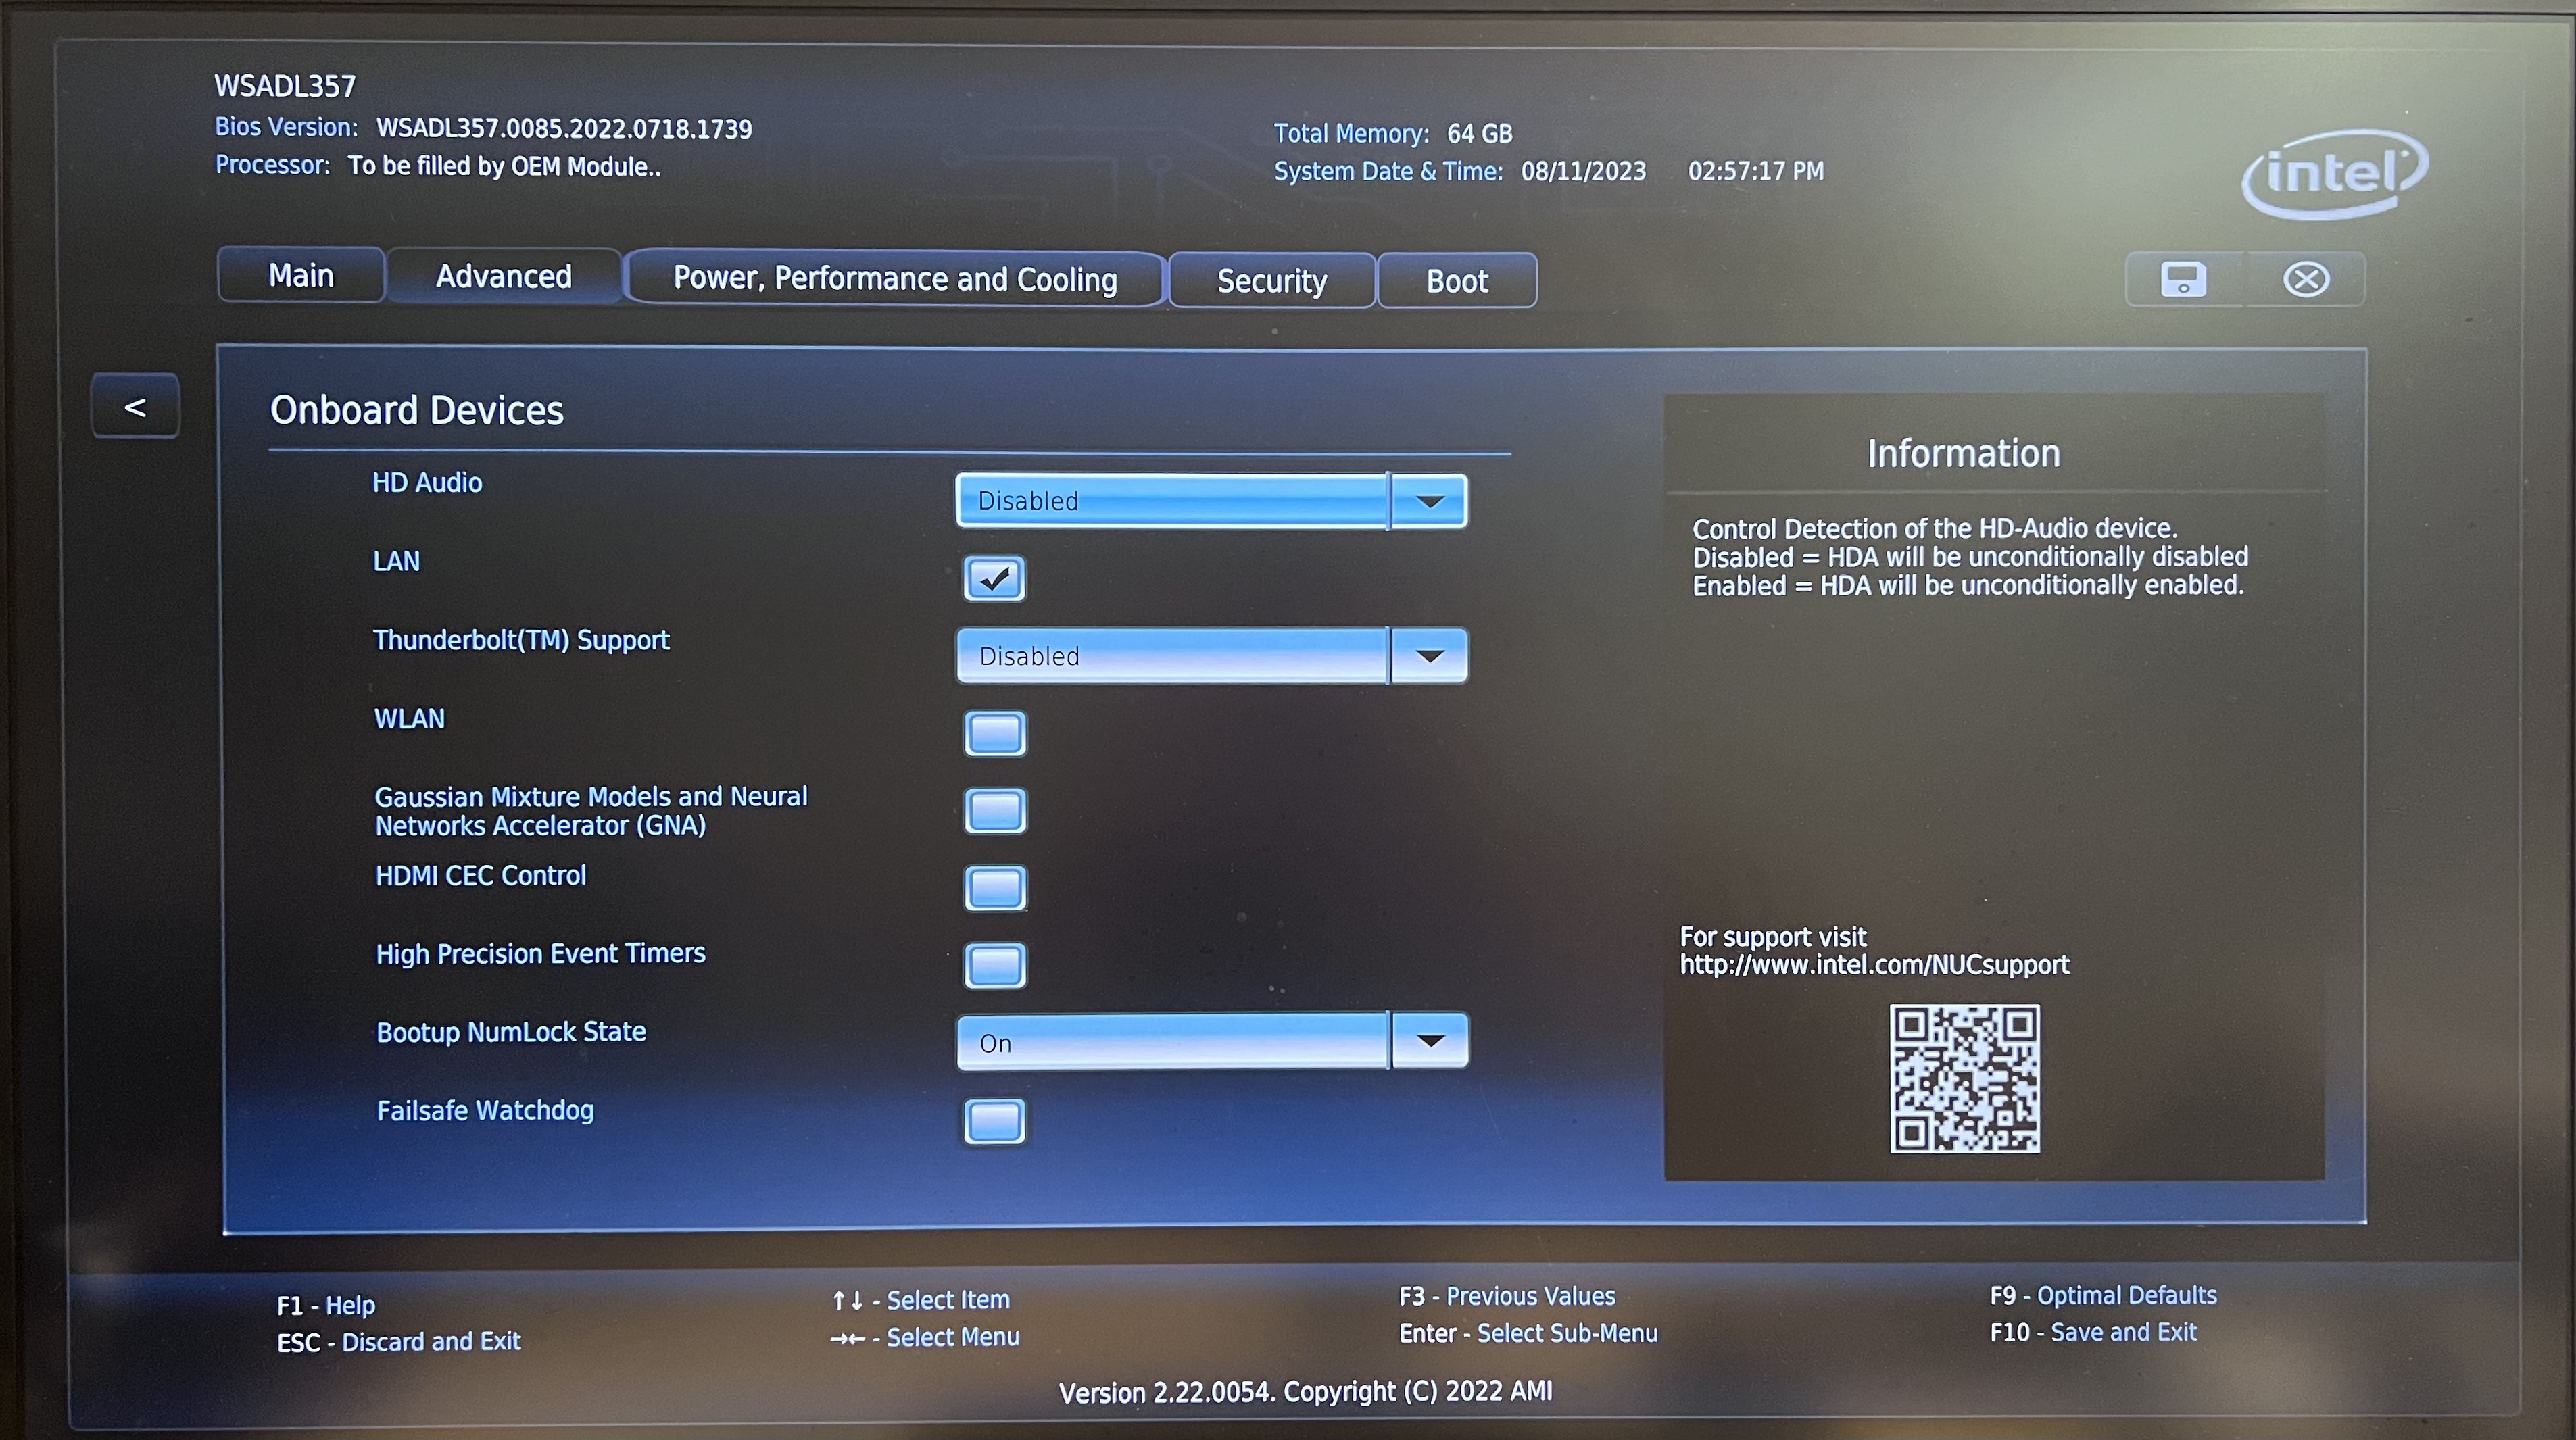
Step 4: Go back to “Advanced” tab and choose “Onboard Devices” and ensure the following settings are unchecked
- WLAN
- Gaussian Mixture Models and Neural Networks Accelerator (GNA)
- HDMI CEC Control
- High Precision Event Timers
- Failsafe Watchdog
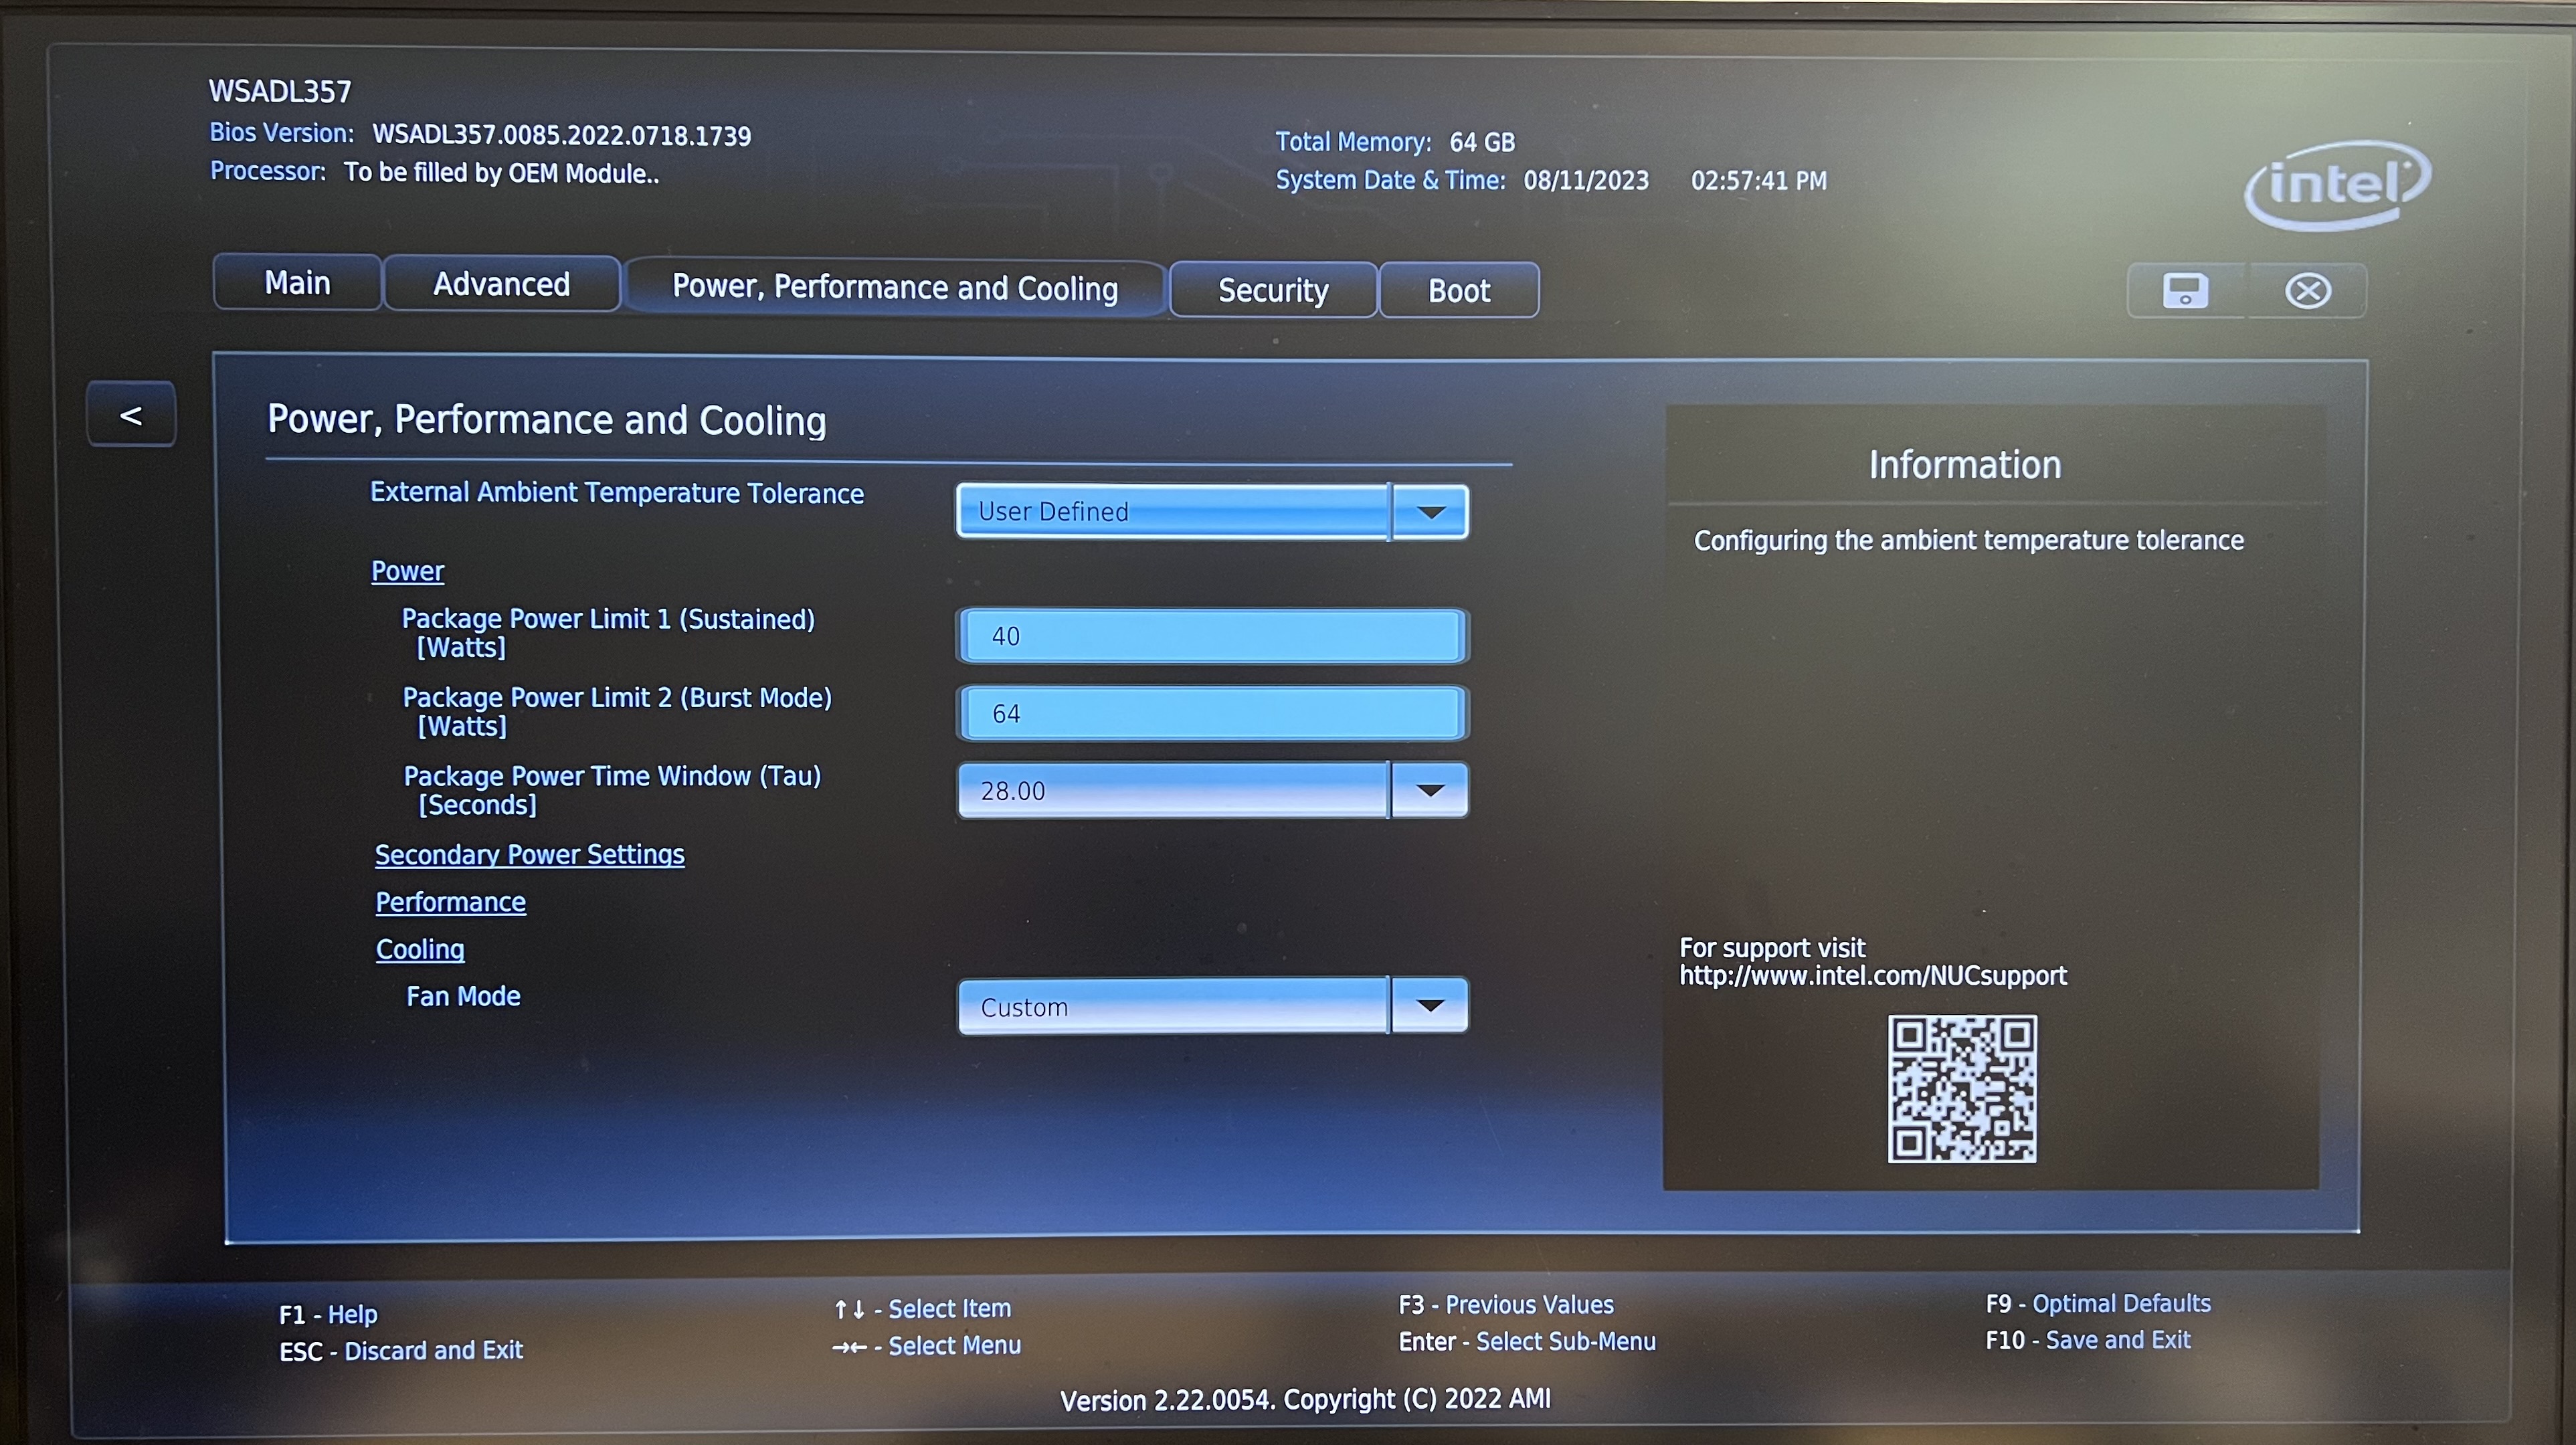
Step 5: Go to “Power, Performance and Cooling” tab and choose “User Defined” for the option of “External Ambient Temperature Tolerance”.
Step 6: In the same tab, choose “Secondary Power Settings” and ensure the following options are unchecked
- Power Sense
- Pseudo G3
- Wake System from S5
- USB S4/S5 Power
- PCIe ASPM Support
- Native ACPI OS PCIe Support

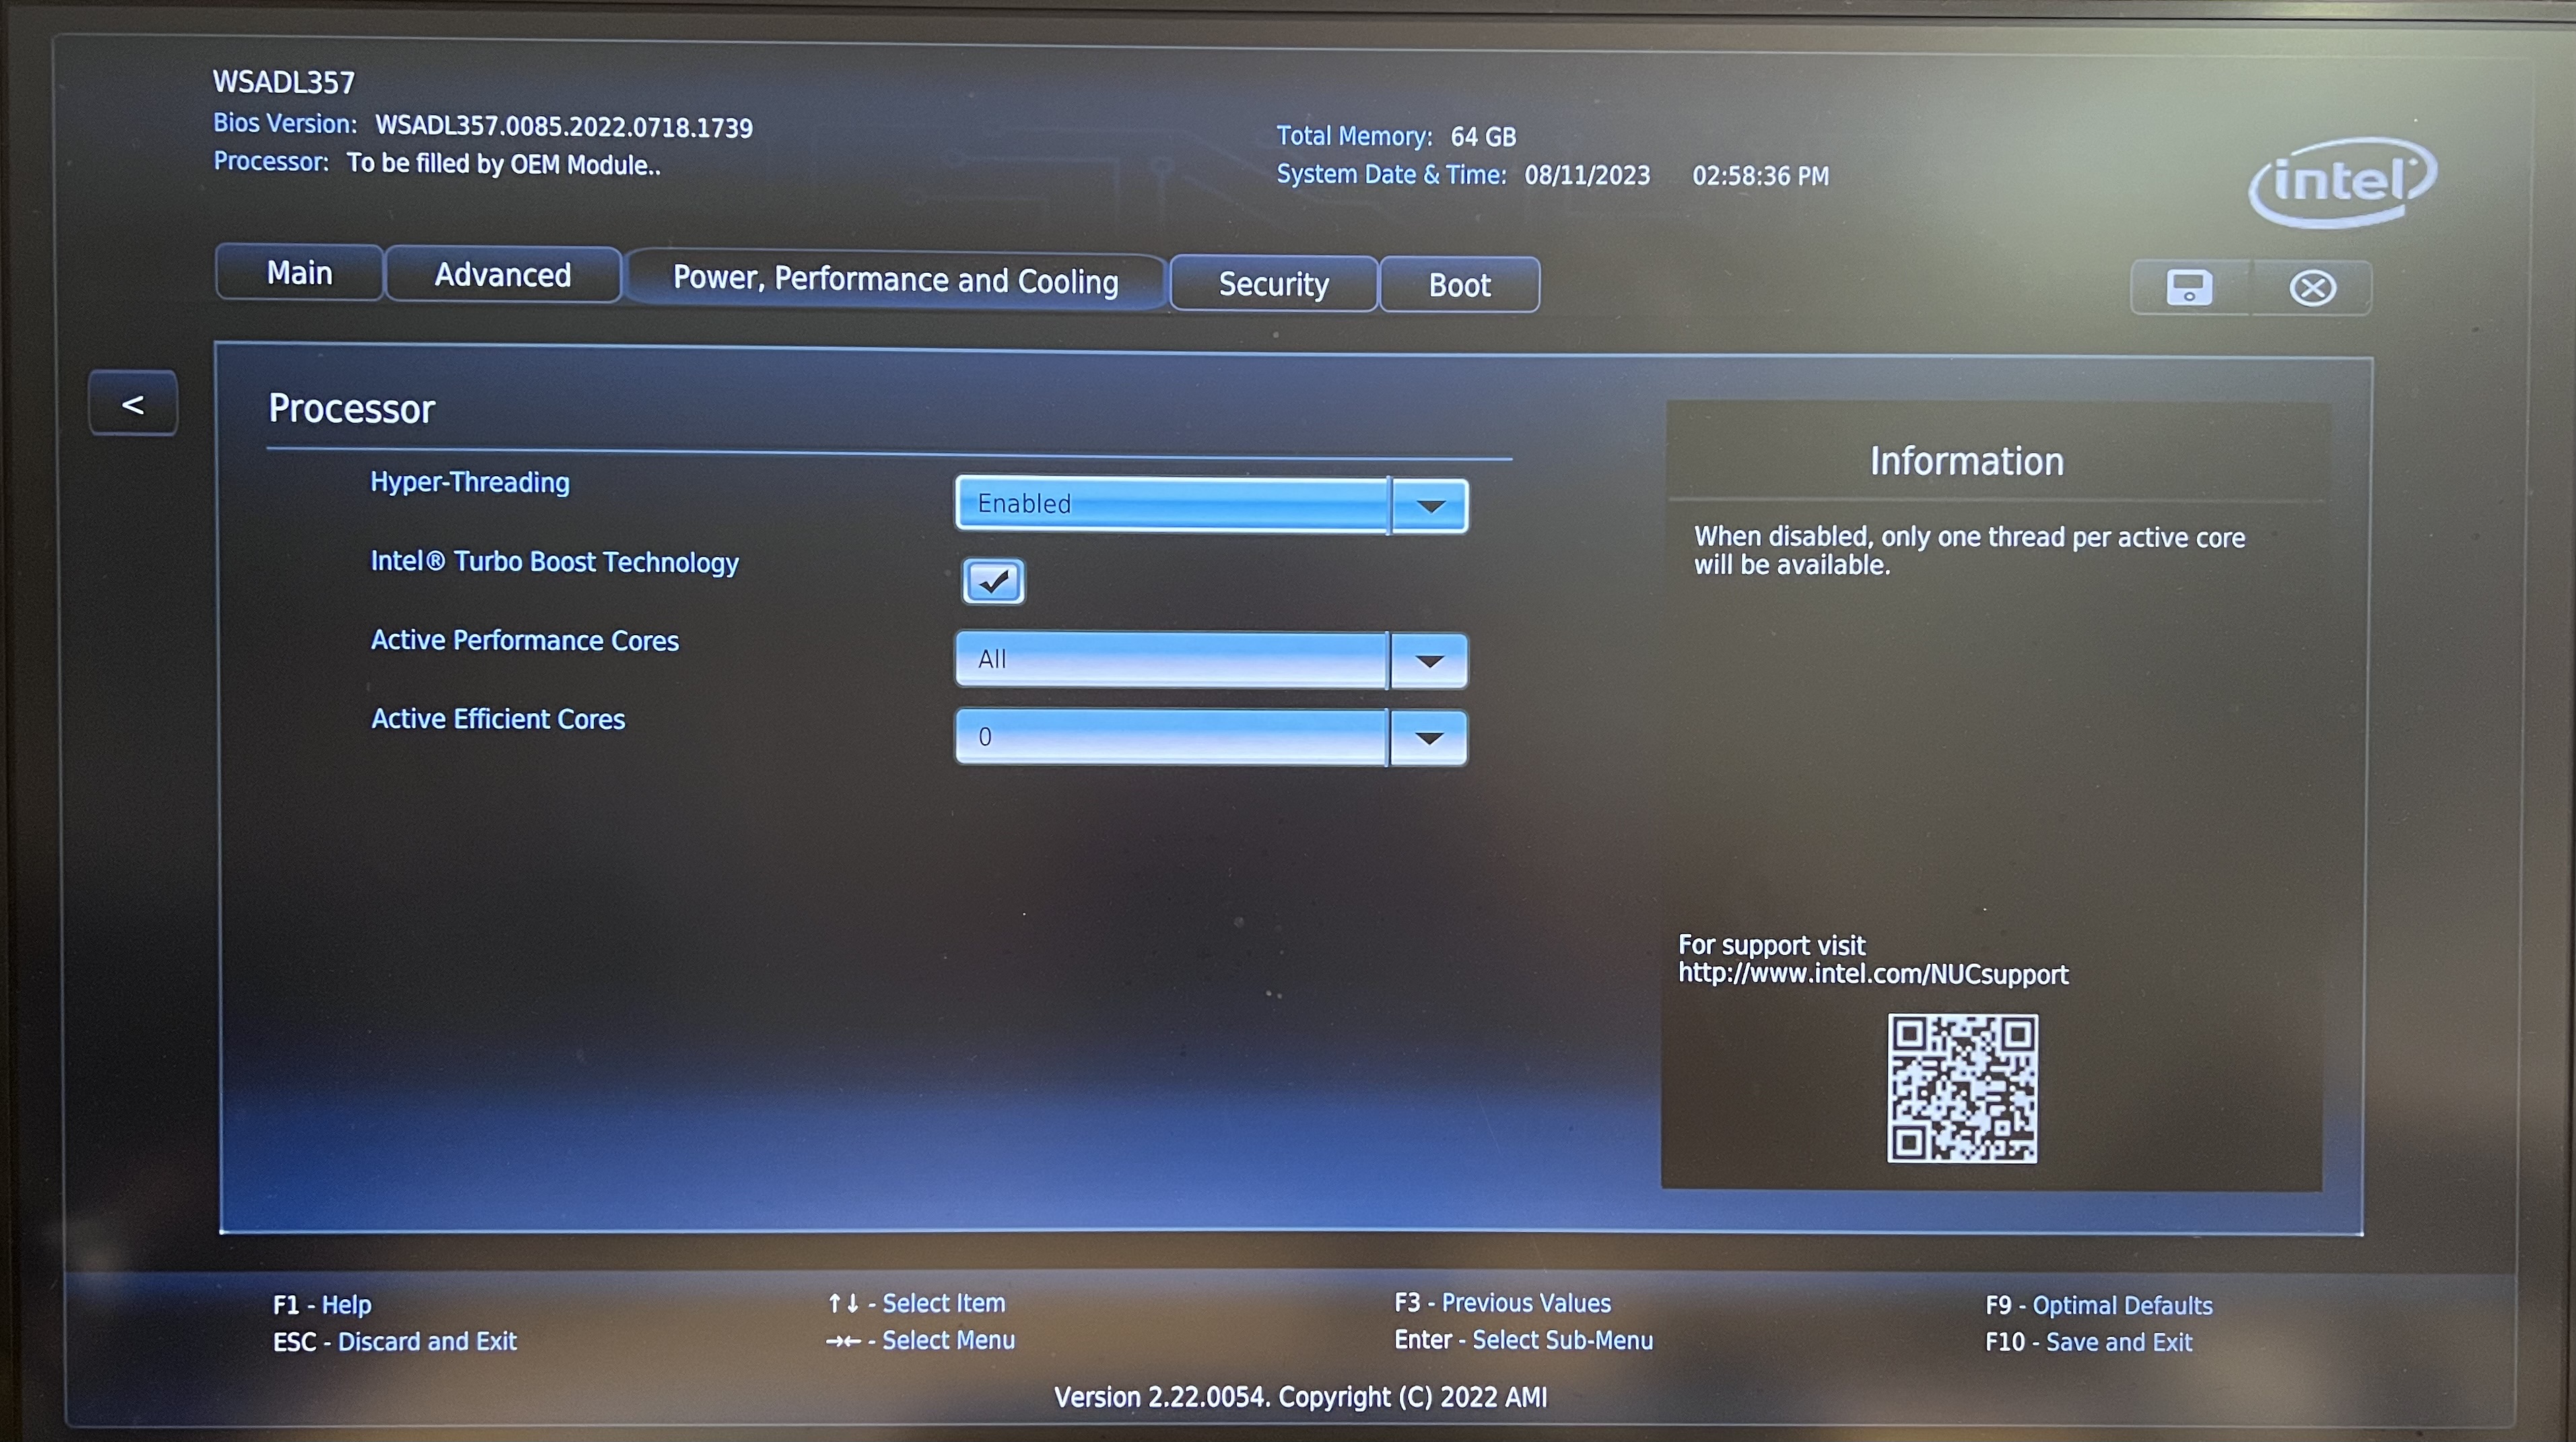
Step 7: Go back to “Power, Performance and Cooling” tab, choose “Performance”. After that, choose “Processor” and change the “Active Efficient Cores” to “0”.
Step 8: Go to “Security” tab and choose “Security Features” and ensure the following settings are configured
- Allow UEFI 3rd party driver loaded —> Check this option
- Intel Platform Trust Technology —> Uncheck this option
- iSetupCfg Password Check —> Choose “Bypass” option

Step 9: Select the “Boot” tab and choose “Secure Boot” and ensure the following settings are configured
- Secure Boot —> Choose “Disabled”
- Secure Boot Mode —> Custom
- Select the “Restore Factory Keys” and ensure the “System Mode” is shown as “Deployed”

Step 10: Still in the same “Boot” tab, choose “Boot Priority” and ensure the following settings are checked
- UEFI Boot
- Boot USB Devices First
- Boot Network Devices Last
- USB
- Optical
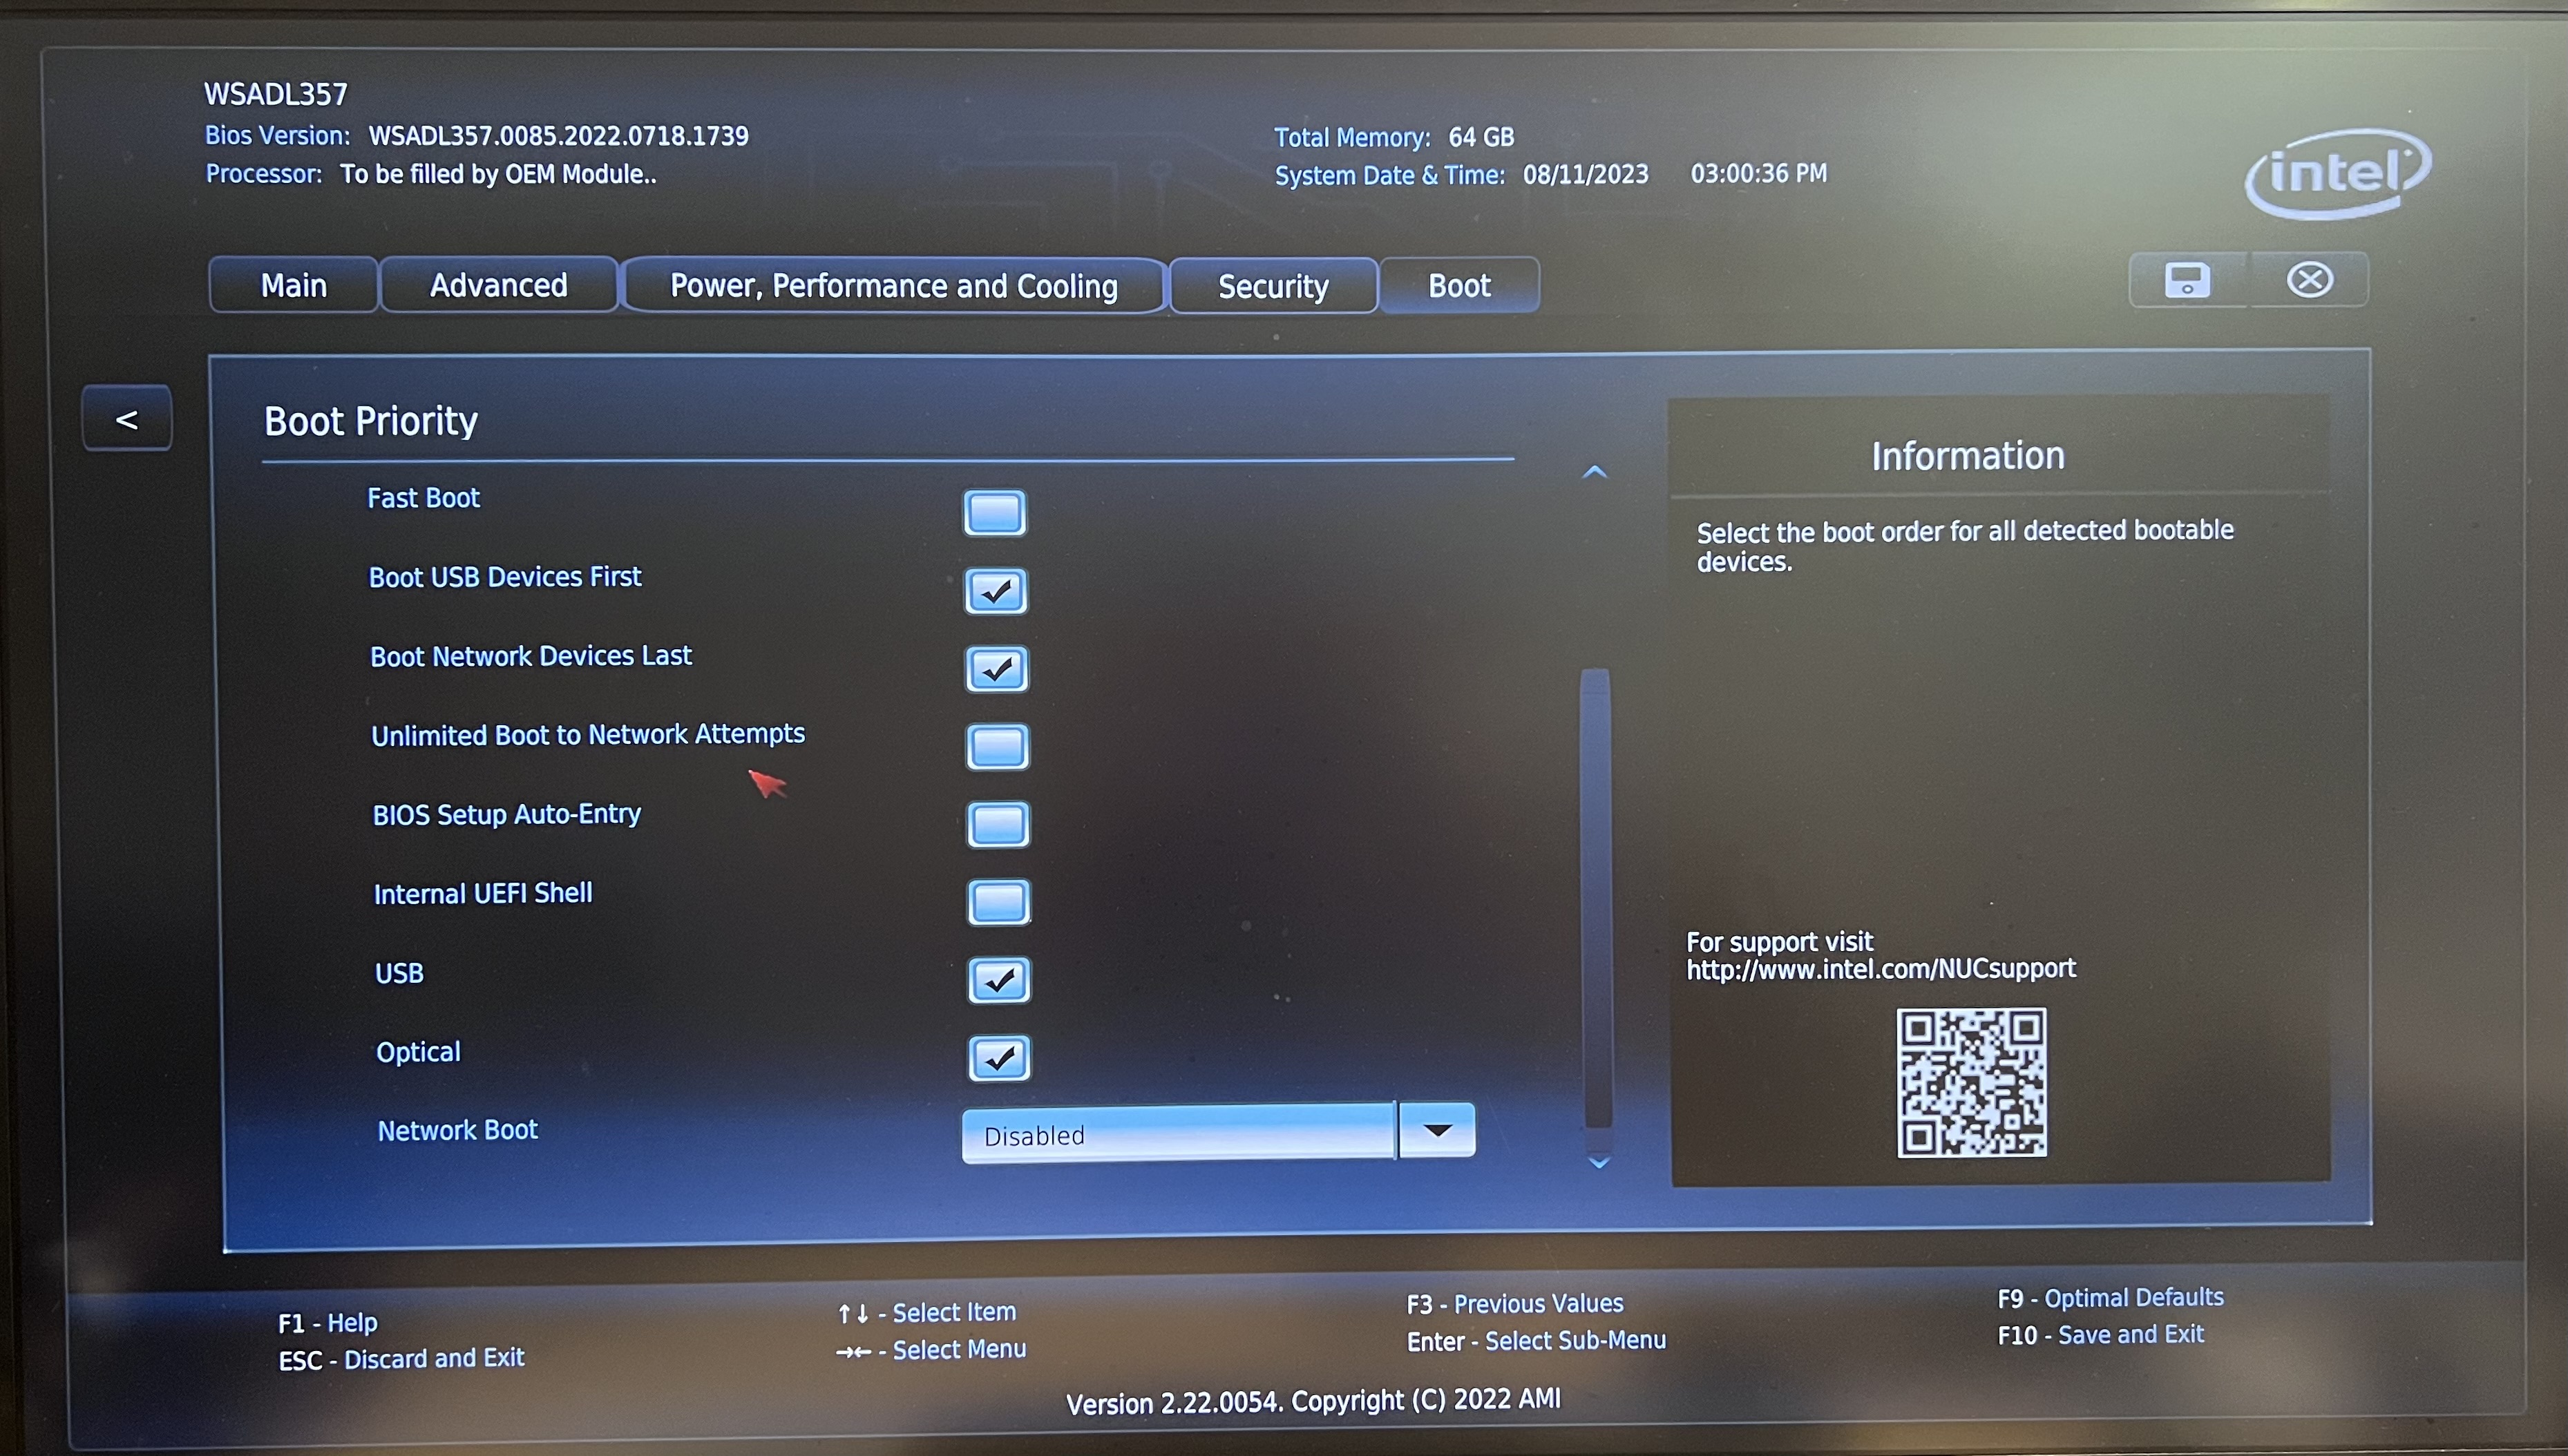
Step 11: Still in the same “Boot Priority” settings, ensure the following settings are unchecked
- Fast Boot
- Unlimited Boot to Network Attempts
- BIOS Setup Auto-Entry
- Internal UEFI Shell

With all these configurations, we are ready to install the Nutanix CE 2.0. In the next blogpost, I will share on the steps to install Nutanix CE into the NUC.

You must be logged in to post a comment.